


EN-39
Accessory air-fi lter unit
An accessory air-fi lter unit is supplied with this projector in order to keep dust out more effectively. When using the
projector in a dusty place, replace the air fi lter (fi lter cover) attached at the factory with this accessory air-fi lter unit.
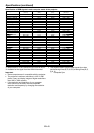
Attaching the accessory air-fi lter unit
Before installing this accessory air-fi lter unit to the projector, be
sure to unplug the projector from the outlet.
Remove the air-fi lter (fi lter cover) attached at the factory fi rst. (See
page 38.)
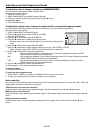
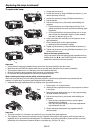
Attach the accessory air-fi lter unit to the projector.
Insert the tabs on the top of the accessory air-fi lter unit in the
projector, and then push the accessory air-fi lter unit in the
direction of the arrow.
Don’t use any other accessory air-fi lter units than that designed for
this projector.
Cleaning the air-fi lter
Warning:
Never use fl ammable air duster or other materials when cleaning the accessory air-fi lter unit. Flammable substances
may ignite causing fi re or breakdown when the lamp is illuminated.
Before cleaning, be sure to turn off the main power switch and unplug the projector from the outlet.
Clean the air-fi lter frequently (at least once a month). When dust accumulates on the fi lter at the air inlet, the
temperature inside the projector may rise abnormally high, causing damage to the internal parts and reducing the
lifetime of the panel.
In case of any abnormality including an abnormal rise of the inside
temperature, the projector may automatically turn off and go into the
standby mode where the light source lamp is turned off in order to
protect its internal parts.
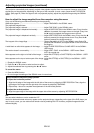
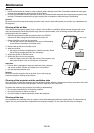
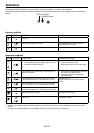
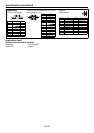
Remove the accessory air-fi lter unit from the projector.
Pull the accessory air-fi lter unit in the direction of the arrow
while pushing up the tabs on the bottom of the accessory air-
fi lter unit.
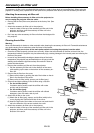
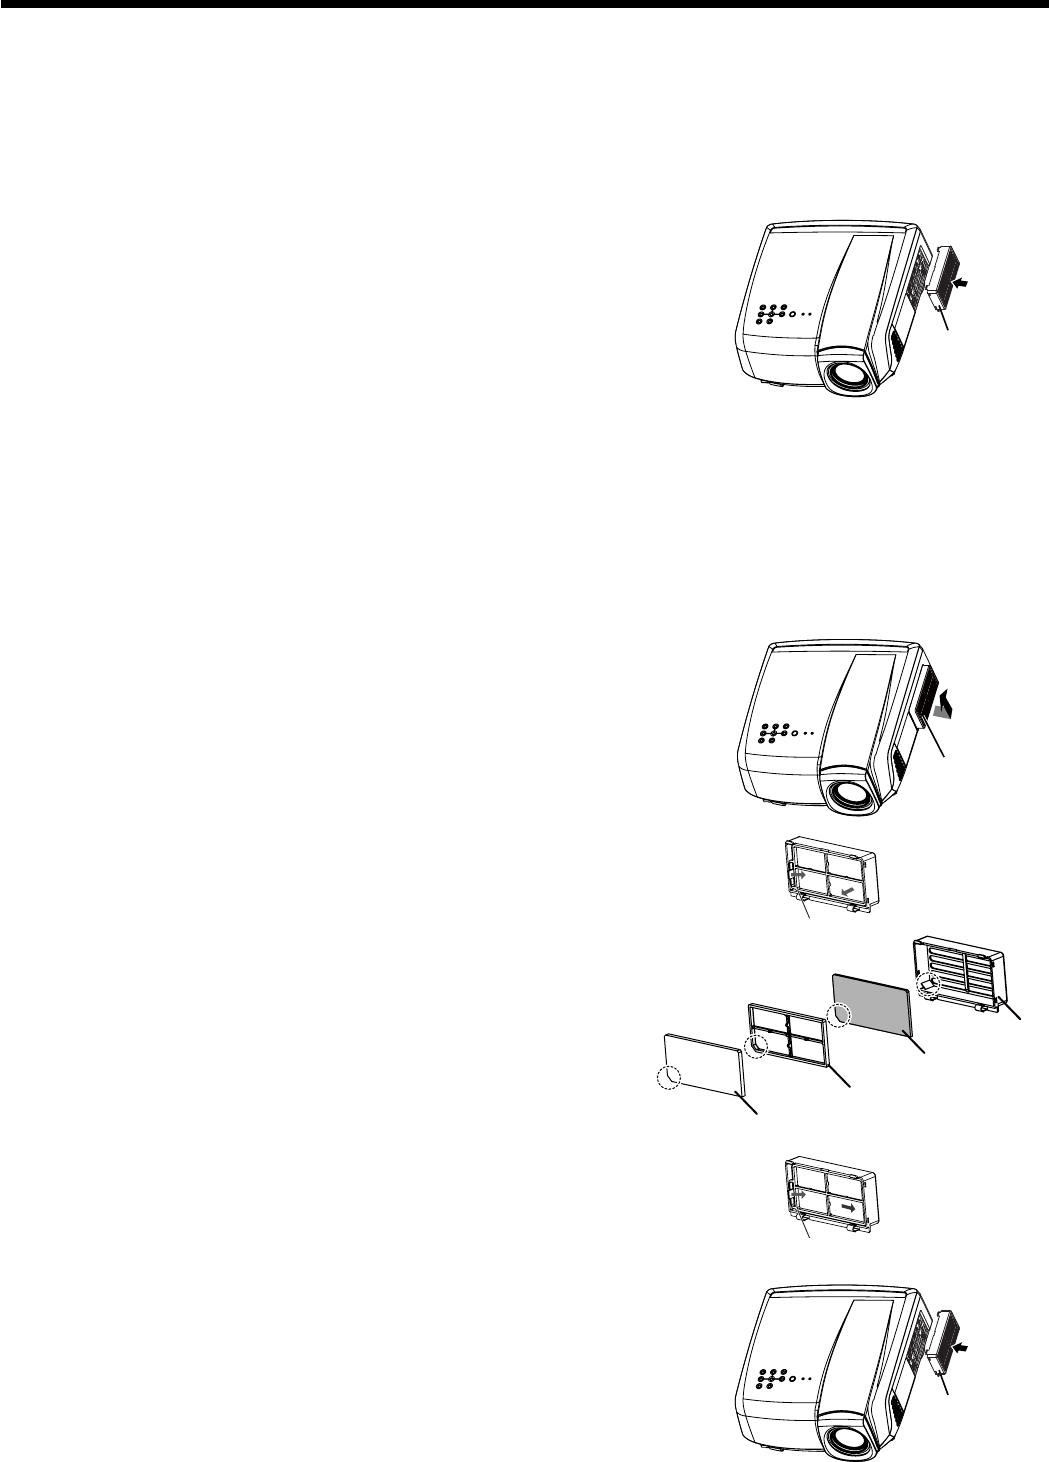
Remove the air-fi lter from the cover.
(1) Remove the holder by pushing the tab of the holder on the air-
fi lter in the direction of the arrow.
(2) Remove the air-fi lter (white), spacer, and air-fi lter (gray).
Clean dirt and dust adhering to the air-fi lter using a vacuum.
For the air-fi lter (white)
If stubborn stains persist, wash the air-fi lter with water
and dry well in the shade.
For the air-fi lter (gray)
If stubborn stains persist, wash the air-fi lter with diluted
detergent, rinse with water, and dry well.
Attach the air-fi lter to the cover.
(1) Attach the air-fi lter (gray), spacer, and air-fi lter (white) to the
cover, aligning their notches with that of the cover.
(2) Insert the right tab of the holder to the cover and push the left
tab in the direction of the arrow to attach the cover.
Attach the accessory air-fi lter unit to the projector.
Insert the tabs on the top of the accessory air-fi lter unit in the
projector, and then push the accessory air-fi lter unit in the
direction of the arrow.
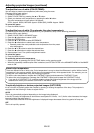
•
1.
•
•
•
•
1.
•
2.
3.
•
•
4.
5.
•
Accessory
air-fi lter unit
Accessory
air-fi lter unit
Holder
Accessory
air-fi lter unit
Holder
Cover
Air-fi lter (gray)
Spacer
Air-fi lter (white)