EN – 16
MENU POSITION
UPPER LEFT
EXPAND MODE
EXPAND
VIDEO MODE
CCS
CINEMA MODE
VIDEO SIGNAL
AUTO
SCART INPUT
OFF
ANAMORPHIC
OFF
Opt
FEATURE
?
TV60
AUTO
RESET ALL
OK
LANGUAGE
English
RESET ALL
OK
Ë
opt.
INSTALLATION
TV60
AUTO POWER
ON
AUTO POWER
OFF
SPLASH
SCREEN
BACK COLOR
MUTE MODE
OFF
OFF
BLACK
ON
BLUE
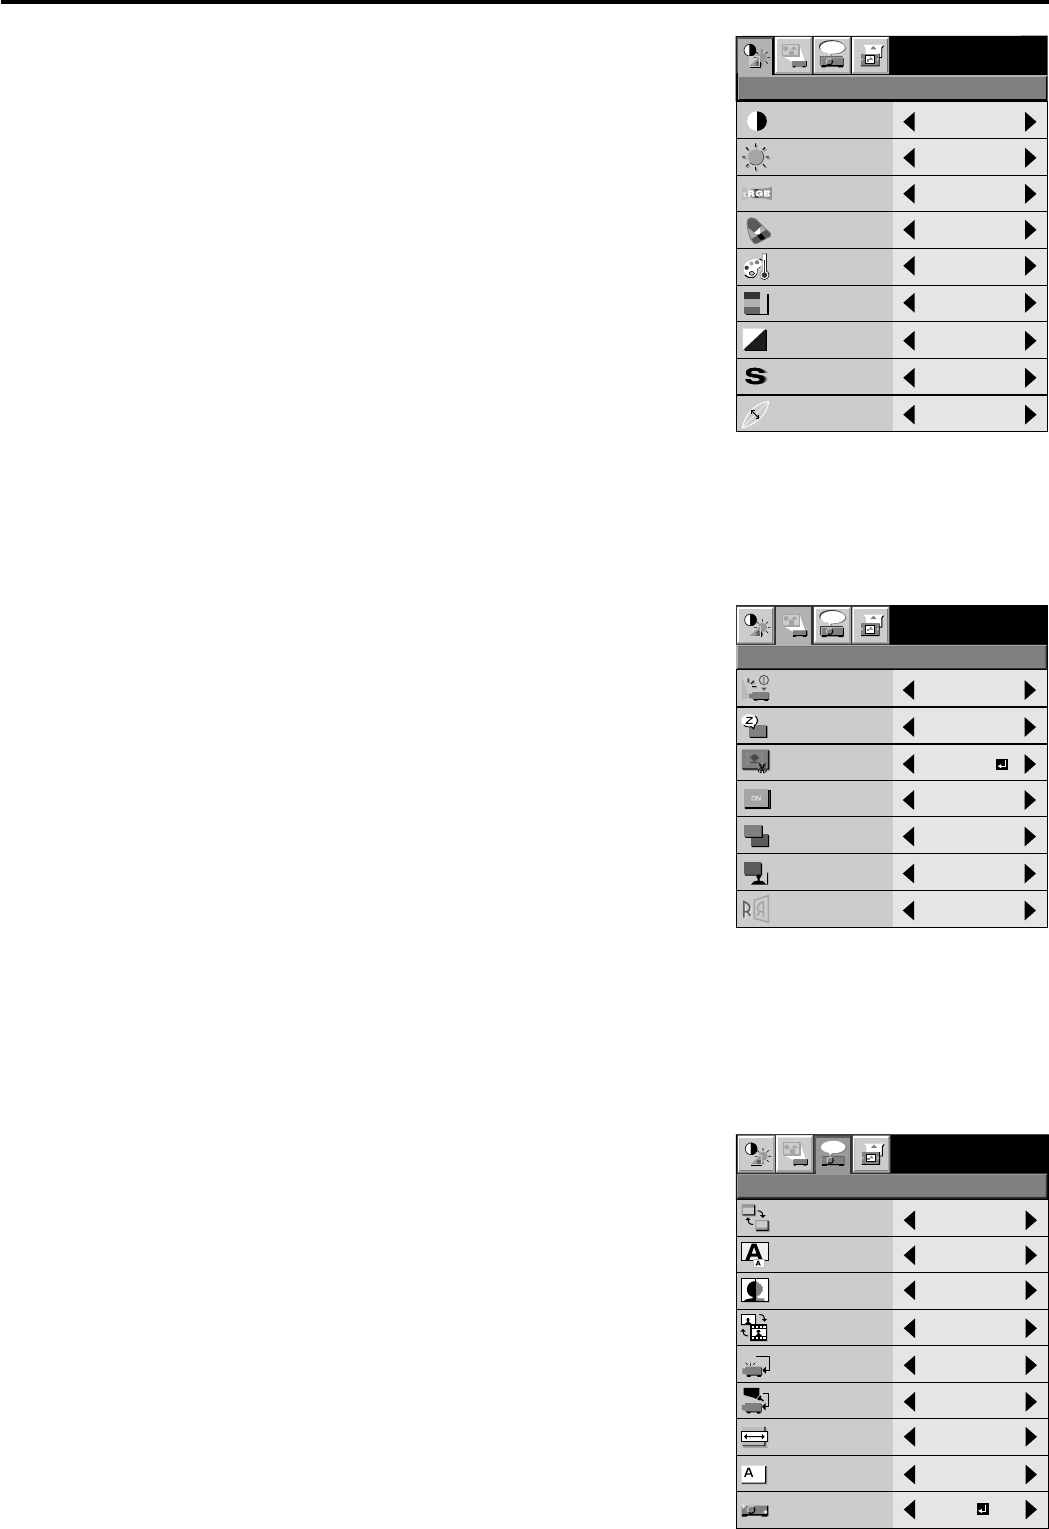
SETUP
IMAGE
REVERSE
OFF
IMAGE
CAPTURE
CONTRAST
sRGB
BRIGHTNESS
COLOR MATRIX
COLOR TEMP
COLOR
TINT
SHARPNESS
0
0
0
0
0
OFF
OFF
STANDARD
opt.
IMAGE
TV60
GAMMA MODE
DYNAMIC
Menu operation (continued)
1 IMAGE
CONTRAST ........ Adjusts the picture contrast. The contrast becomes
higher as the number increases.
BRIGHTNESS .... Adjusts the image brightness. The image becomes
brighter as the number increases.
sRGB ................... Select ON to display an image emphasizing on the color
reproducibility.
• When sRGB is ON, COLOR MATRIX, COLOR
TEMP or GAMMA MODE can’t be adjusted.
COLOR MATRIX .......
Adjusts the color balance in each color of the image. See page
18.
COLOR TEMP. ... Adjusts the color temperature. See page 18.
COLOR ................ Adjusts the color intensity of the image. (Available only
when VIDEO is selected as the source.)
TINT .................... Adjusts the color balance of the image. The color balance
of the image shifts green as the number increases and
shifts to purple as the number decreases. (Available only
when VIDEO is selected as the source.)
• TINT cannot be adjusted when a TV50 (PAL or
SECAM) signal is being displayed.
SHARPNESS ...... Adjusts the image sharpness. The image sharpness rises as the number increases.
(Available only when VIDEO is selected as the source.)
GAMMA MODE . Select DYNAMIC for computer sources. Select STANDARD for sport scenes and video
sources. Select THEATER for projecting film sources.
2 INSTALLATION
AUTO POWER ON ....
Select ON to boot up the projector automatically by
turning on an externally connected power switch such as
a breaker even when the main power switch of the
projector is off. Use this setting when the projector is
hanging from the ceiling.
• The projector will be in the stand-by mode when the
lamp is off. Use the remote control to turn on the
lamp.
AUTO POWER OFF ..
Set the time elapsed before the projector enters into the
stand-by mode when there is no signal present at the
selected source.
IMAGE CAPTURE ....
Capture the screen for Splash screen. See page 23.
SPLASH SCREEN .....
Select ON to display the splash screen when the power is
turned ON.
BACK COLOR .... Select the color of the background to blue or black, this will be displayed when there is no
signal present at the selected source.
MUTE MODE ..... Use to select the background, BLACK or IMAGE, which will be displayed when the MUTE
button is pressed. When the IMAGE is selected, the splash screen will be displayed.
IMAGE REVERSE.....
Use to reverse or invert the projected image. Select MIRROR in rear projection. Select
MIRROR, INVERT in rear projection with the projector hanging from the ceiling.
3 FEATURE
MENU POSITION .....
Use to select the position of the menu on the screen,
UPPER LEFT or LOWER RIGHT.
EXPAND MODE .. Select the mode for enlarging screen. See page 20.
VIDEO MODE .... Use to select the modes of the high quality line doubler.
Select CCS for the Cross Color Suppression mode. Select
CCS+DCDi for the Cross Color Suppression and DCDi
mode. Select DCDi for DCDi mode. Select OFF for
through mode.
• Though square-shaped noise may appear in the
projected image when except OFF is selected, this is
not failure. If it is obtrusive, select OFF. It may take
time to switch from/to OFF. Though the image is not
displayed correctly in this time, it is not a failure.
• A playback signal on a deteriorated videotape or a
poor-quality signal may not be projected properly.
When projecting such a signal, change the setting of
the Video mode and check the projection quality.


