E-50
Setup
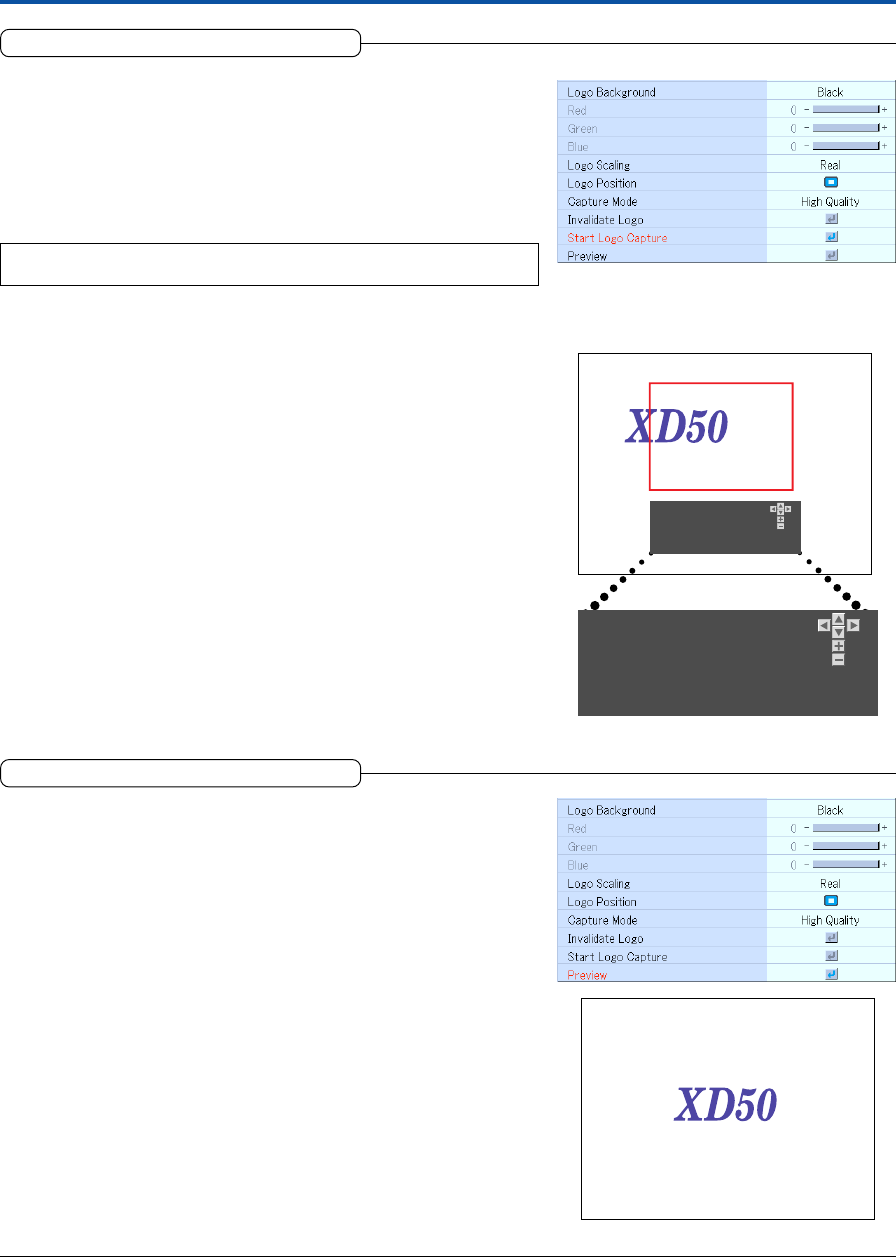
Start Logo Capture
This executes image capture.
See “Startup Logo Creation” on Page E-57 for information about using logo
capture.
Select item name “Logo Capture”, press the ENTER button, and the sub menu
will open.
Select “Start Logo Capture” and press the ENTER button.
There is a change to the capture range selection display.
Note:
Selection is not possible in the absence of a signal.
Movement of the Capture Range
Use the SELECT ̆̄̇̈ buttons on the remote control to move the red frame.
Width/Height Adjustment of the Capture Range
The MENU button will switch between the height adjustment and the width
adjustment.
There is a change to the display of the selected “Adjust Capture Region Height”
or “Adjust Capture Region Width”.
Adjust the capture range (i.e., red frame) with the remote control “+”/“–” but-
tons.
To Cancel
Press the CANCEL button. There is a change to the menu display.
Starting Capture
Press the ENTER button start the capture.
Move Capture Region.................................
Adjust Capture Region Height.........................
Toggle Width/Height Adjustment ................... “MENU”
Start .........“ENTER” Exit .........“CANCEL”
Move Capture Region ................................
Adjust Capture Region Height .......................
Toggle Width/Height Adjustment ..............“MENU”
Start .........“ENTER” Exit .........“CANCEL”
Display for capture selection
Preview
This is used in checking the logo capture display at startup time. Selec-
tion is not possible without using capture.
See “Startup Logo Creation” on Page E-57 for information about using logo
capture.
Select item name “Logo Capture”, press the ENTER button, and the sub menu
will open.
Select “Preview” and press the ENTER button to preview the image.
To close, press the CANCEL button or the ENTER button.
