


EN-12
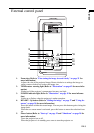
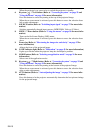
10. BLANK button (Refer to "Switching input signal" on page 27 for more
information.)
Used to hide the screen image. Press Blank again to restore the image.
11. MODE button (Refer to "Application Mode" on page 31 for more information.)
Depending upon which input signal is selected, there are several picture setup options
available.
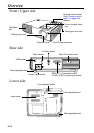
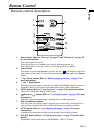
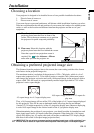
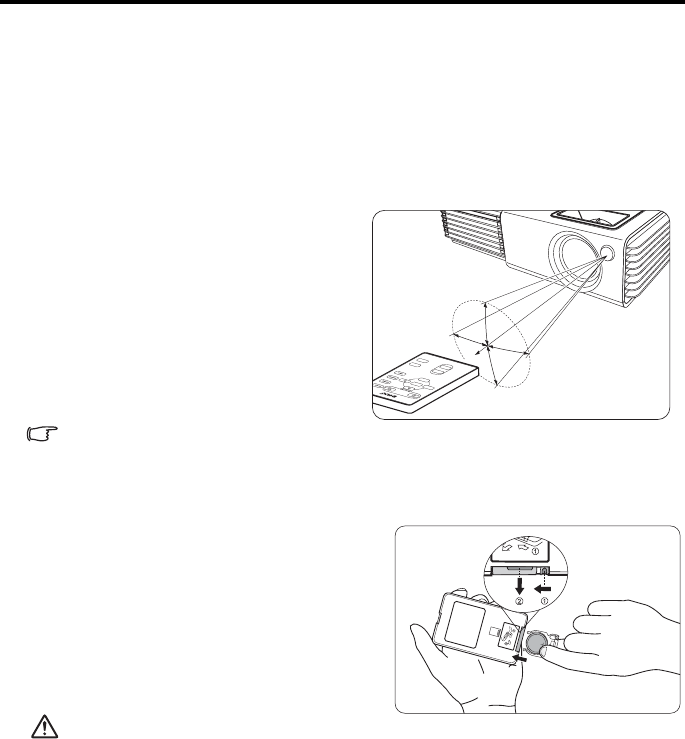
Remote control effective range
Make sure that there are no obstacles between the remote control and the IR sensors on the
projector that might obstruct the infra-red beam.
Installing or replacing the remote control battery
• Avoid excessive heat and humidity.
• There may be danger of damage to the remote and injury to those nearby if the battery is
incorrectly replaced.
• Replace only with the same or equivalent type recommended by the manufacturer.
• Dispose of the used battery according to your local regulations.
• Never throw a battery into a fire. There may be danger of an explosion.
• If the battery is dead or if you will not be using the remote control for a long time, remove the
battery to prevent damage to the remote control from possible battery leakage.
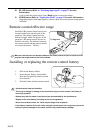
Infra-Red (IR) remote control sensors are
located on the front and the back of the
projector. The remote control must be
held at an angle within 30 degrees of the
projector’s IR remote control sensors to
function correctly. The distance between
the remote control and the sensors should
not exceed 6 meters (~ 20 feet).
6 meters
30 degrees
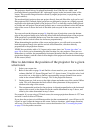
1. Pull out the battery holder.
2. Insert the new battery in the holder.
Note that the positive polarity should
face outward.
3. Push the holder into the remote control.