AppleTalk 4–33
4 Configuring Your Network Printer
Follow these steps to select the network.
1. Select the Control Panels option from the Apple
menu.
2. Open the Network control panel.
3. In the AppleTalk Connection window, select the
icon that represents the network type you want to
use, either LocalTalk or EtherTalk.
4. If you are using an EtherTalk network that has been
divided into zones, select the appropriate zone.
5. Close the Network control panel.
6. Run the NEC 1765 software for Macintosh.
7. Select the pull-down menu under AppleTalk Zone
and choose the printer’s AppleTalk zone. The
factory default zone is “*”. For more information see
“Changing the Printer’s AppleTalk Zone” on
page 5-54.
8. The default name of the printer is “NP_” followed
by six digits. If you wish, you may change the
printer name. Select the current printer name in the
scrolling list at the center of the Printer
Administration window. Select the Change Printer
Name button from the Printer Administration
window. Enter the new name and select OK. For
more information see “Changing the Printer Name”
on page 5-54.
9. Close the NEC 1765 software.
Select the Printer
Before printing documents, select the Silentwriter using
the Chooser. Follow these steps.
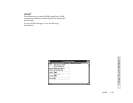
1. Select Chooser from the Apple menu. The Chooser
window appears.
2. At the bottom right side of the Chooser window,
make sure that AppleTalk is Active.
3. Select the AppleTalk Zone from the scrolling list in
the bottom left side of the Chooser window.
4. Select the LaserWriter driver icon.
5. Select the name of the Silentwriter you want to use
from the scrolling list on the right.
6. Select the Setup button at the bottom right of the
Chooser window to specify a PPD file.
7. Click the Auto Setup button. Make sure that the
NEC Silentwriter 1700 PPD file is selected. If not,
select it from the scrolling list of printer drivers.
Click the Select button to leave the Select PPD
dialog box and move to the Configure dialog box.
8. Check the list of hardware features to make sure it
reflects the features currently installed on your
Silentwriter. Hardware features include optional
cassettes, duplex and offset trays, and envelope
feeders.
9. When satisfied with your selections, select the OK
button to leave the Configure dialog box.
10. Select the OK button to leave the Setup dialog box.
11. Close the Chooser window.
note:
If you install additional hardware features in
your Silentwriter, use the Configure dialog box to
update the printer setup.


