


Installing the Fuser Components 17
GETTING STARTED
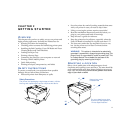
INSTALLING THE FUSER
C
OMPONENTS
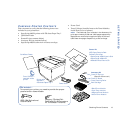
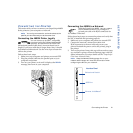
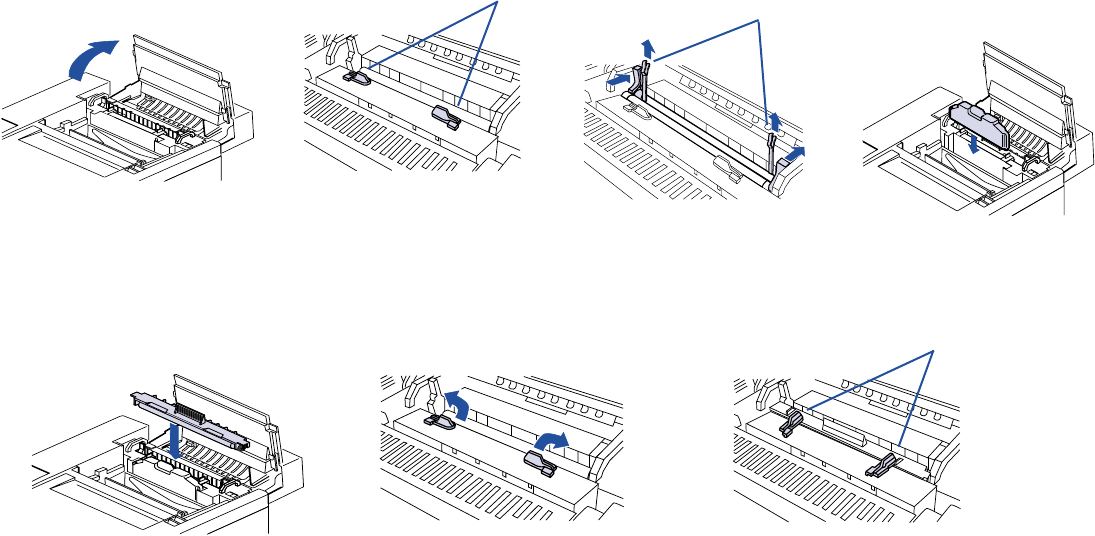
Follow the steps below to install the Fuser Oil bottle and the
Fuser Cleaning Roller:
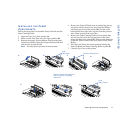
1. Open the Top Cover of the printer (A).
2. Make sure the Lock Tabs are in the open position (B).
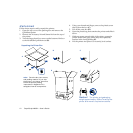
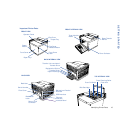
3. Remove the orange Tension Release Pins from the ends
of the Fuser Rollers. Open the Pressure Release Tabs and
pull the pins up and out (C).
note: You may have to pull hard to remove these.
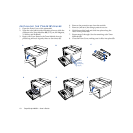
4. Remove the Fuser Oil Bottle from its plastic bag and set
into place with the shunt valve down and the labeled
side facing the front of the printer (D). The tab on the
bottle should face right when viewed from the printer’s
front. Place in front of the Lock Tabs.
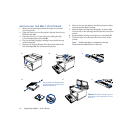
5. Remove the Fuser Cleaning Roller from its plastic bag
and set into place with the exposed part of the roller
facing the front of the printer (E). The extra tab should be
on the left. Place in back of the Lock Tabs over the Fuser
Rollers.
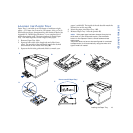
6. Turn the Lock Tabs to the closed position holding the
Fuser Oil Bottle and Fuser Cleaning Roller in place (F).
7. Close the Top Cover of the printer.
A
B
C
D
EF
Lock
Tabs Open
Tension Release Pins
G
Lock
Tabs Closed
Save the Tension Release Pins
and along with all packing
materials!