


16 SuperScript 4650 Series — User’s Guide
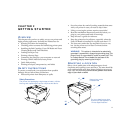
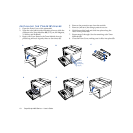
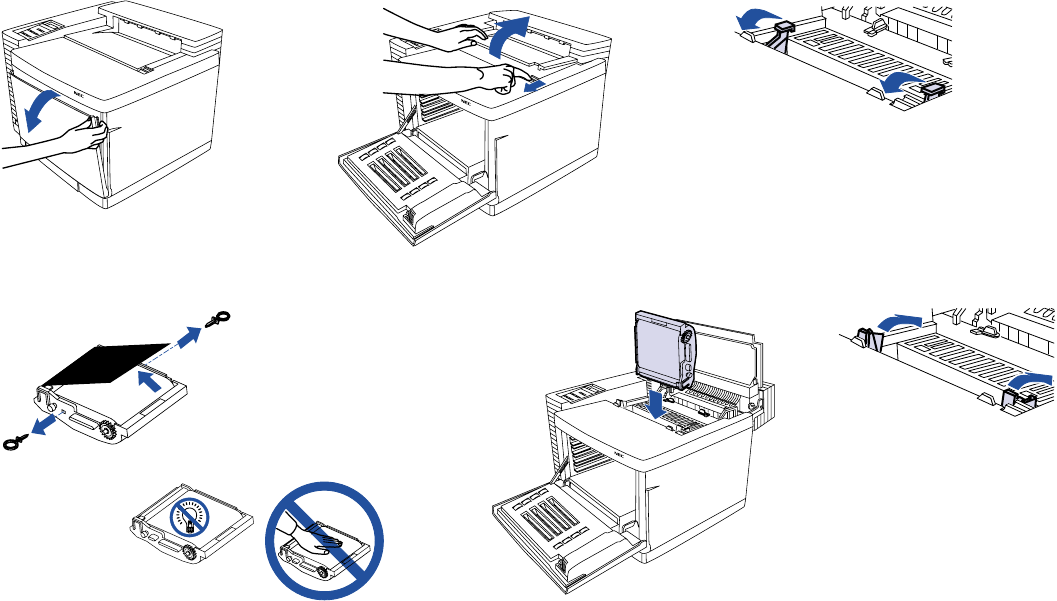
INSTALLING THE BELT CARTRIDGE
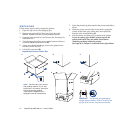
1. Make sure all packing materials and tape are removed
from the printer. If you are setting up a 4650NX printer,
attach the optional 250-sheet Tray first before installing
the Belt Cartridge!
See “Adding the Paper Tray 2 Unit” in Chapter 3.
2. Open the Front Cover of the printer with the Front Cover
Release Latch (A).
3. Open the Top Cover of the printer by sliding the Top
Cover Release button toward you (B)
4. Flip up the Belt Cartridge Locking Levers inside the top
of the printer (C).
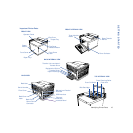
5. Remove the Tension Release Pins from both sides of the
Belt Cartridge (D). Do not discard these pins.
6. Remove, but do not discard, the black protective sheet
from around the Belt Cartridge.
7. Slide the Belt Cartridge into the guides, as shown (E).
The flat side of the cartridge should face the front of the
printer.
8. Snap the Belt Cartridge Locking Levers into place (F).
9. Close the Top Cover and then the Front Cover of the
printer.
note: The Belt Cartridge is sometimes called the
Photoconductor Belt Module or OPC Unit.
A
B
C
D
F
E
Caution The Belt Cartridge should
slide easily into the printer. Do not
force it!
Save the Tension Release Pins
and black cover along with all
packing materials!