


NETGEAR ProSafe SSL VPN Concentrator 25 SSL312 Reference Manual
2-12 Installing the SSL312
v1.1, November 2006
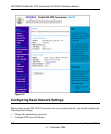
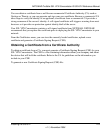
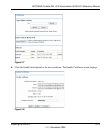
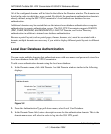
2. In the Digital Certificate Management section, click New CSR/CRT. The Create CSR screen
will display.
3. Fill out all of the fields with the appropriate information. This information will appear in your
certificate and will be visible to users.
4. Check the Generate a Self-signed Certificate checkbox to generate a new CRT.
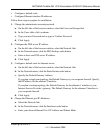
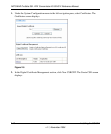
5. Click Apply. If all information is entered correctly, a file download screen displays. Click Save
to save the
CRT.ZIP file to a disk location. This file includes a SERVER.CRT and a SERVER.KEY
key file.
6. Upload and enable the certificate according to the instructions later in this chapter.
Uploading and Enabling the New Certificate
For uploading to the SSL VPN Concentrator, the certificate information must be in a zipped file
containing a certificate file named
SERVER.CRT and a certificate key file named SERVER.KEY. If the
zipped file does not contain these two files, the zipped file will not be uploaded. Any file name
will be accepted, but it must have the .
ZIP extension..
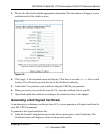
To upload and enable the new certificate:
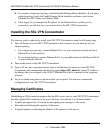
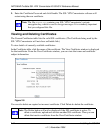
1. Under the System Configuration menu in the left navigation pane, select Certificates. The
Certificates menu will display as shown in the previous section.
2. In the Import Digital Certificate table, select Browse to locate the zipped digital certificate file
on your disk or network drive.
3. Click Upload to save the file to the Cert Description table. Once the certificate has been
uploaded, the certificate is displayed in the Current Certificates table.
Note: Do not upload the CSR file to the SSL VPN Concentrator.
Note: Valid certificates generated by an authorized Certificate Authority (CA) require
a password. Before you enable the certificate and restart the software, be sure
to enter the correct certificate password on the Enable Certificate window.