Making the Physical Connections 2-11
CC
CC
hh
hh
aa
aa
pp
pp
tt
tt
ee
ee
rr
rr
22
22
MM
MM
aa
aa
kk
kk
ii
ii
nn
nn
gg
gg
tt
tt
hh
hh
ee
ee
PP
PP
hh
hh
yy
yy
ss
ss
ii
ii
cc
cc
aa
aa
ll
ll
CC
CC
oo
oo
nn
nn
nn
nn
ee
ee
cc
cc
tt
tt
ii
ii
oo
oo
nn
nn
ss
ss
This section tells you how to make the physical connections to your Netopia 4553 Router. This section covers
the following topics:
■
“Find a location” on page 2-11
■
“What you need” on page 2-11
■
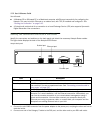
“Identify the connectors and attach the cables” on page 2-12
■
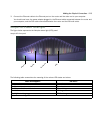
“Netopia 4553 Router status lights” on page 2-13
Find a location
When choosing a location for the Netopia 4553 Router, consider:
■
Available space and ease of installation
■
Physical layout of the building and how to best use the physical space available for connecting your Netopia
4553 Router to the LAN
■
Available wiring and jacks
■
Distance from the point of installation to the next device (length of cable or wall wiring)
■
Ease of access to the front of the unit for configuration and monitoring
■
Ease of access to the back of the unit for checking and changing cables
■
Cable length and network size limitations when expanding networks
For small networks, install the Netopia near one of the LANs. For large networks, you can install the Netopia in
a wiring closet or a central network administration site.
What you need
Locate all items that you need for the installation.
Included in your router package are:
■
The Netopia 4553 Router
■
A power adapter and cord with a mini-DIN8 connector
■
One Category 5 Ethernet cable
■
One Category 5 DSL WAN (or Line) cable
■
A DB-9 to DB-9 console cable
■
The Netopia CD containing software and documentation


