8
6
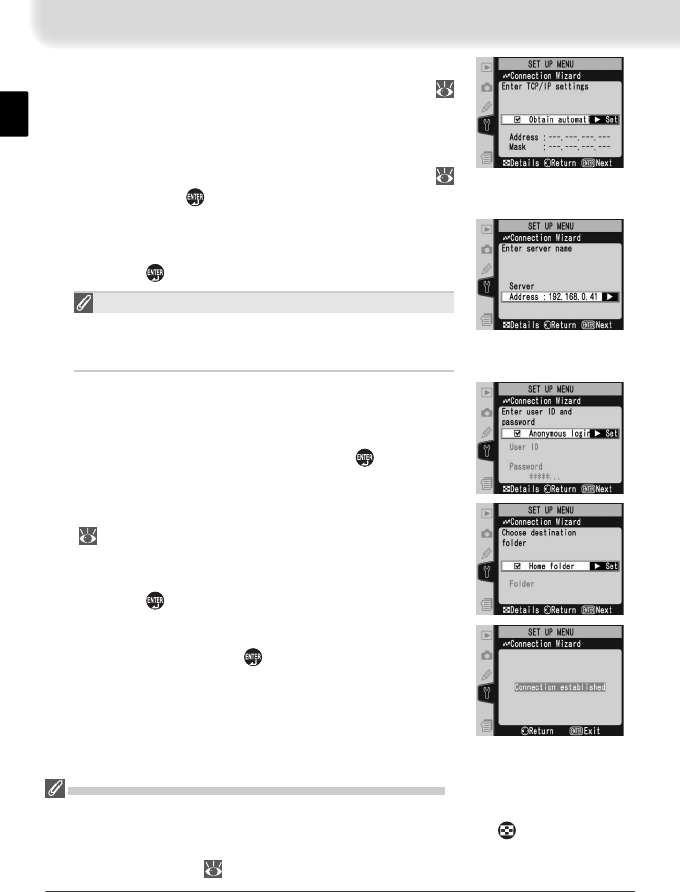
If the network is confi gured to supply an IP ad-
dress automatically by DHCP server or Auto IP (
51), press the multi selector to the right to select
Obtain automatically. If the network requires a
fi xed IP address or subnet mask, enter the infor-
mation supplied by the network administrator (
28). Press the
button to proceed to Step 7.
7
Press the multi selector to the right and enter the
server URL or IP address as described on page 32.
Press the button to proceed to Step 8.
“UNABLE TO LOCATE SERVER”
If this error is displayed, press the multi selector to the
left to return to Step 6 or 7 and enter a valid IP address
and server name.
8
If anonymous login is permitted, press the multi
selector to the right to select Anonymous
login. Otherwise enter a user ID and password
as described on page 33. Press the button to
proceed to Step 9.
“WIRELESS ERROR,“ “TCP / IP ERROR,” “FTP ERROR“
The above errors indicate that the associated wireless network options are set incorrect-
ly. After checking settings for the host or access point, press the button to restart
the Connection Wizard and adjust camera settings to match. For more information, see
“Sample ftp Settings” ( 42).
9
To upload images to the server’s home directory
( 34), press the multi selector to the right to
select Home folder. To choose a different folder,
enter the folder name as described on page 34.
Press the button to proceed to Step 10.
10
The dialog shown at right is displayed when setup
is complete. Press the button to exit the wizard
and return to the wireless LAN menu.


