15
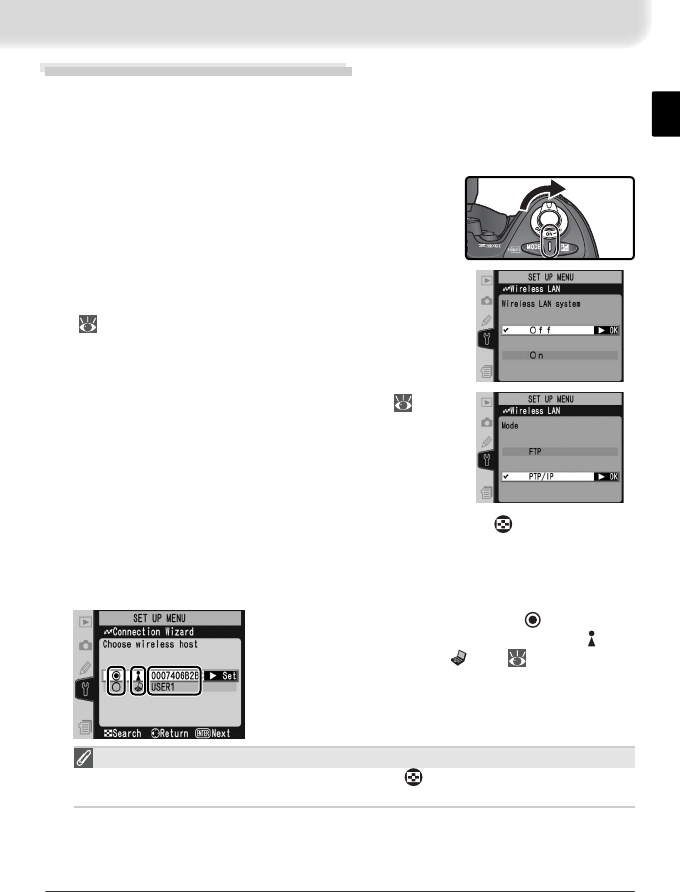
Setup Using the Connection Wizard
First-time setup can be completed with the help of the Connection Wizard.
Make sure the network is active before starting. To prevent changes to set-
tings from being lost should the camera monitor turn off automatically, use
the optional AC adapter or choose the maximum camera monitor off delay.
1
Turn the camera on.
2
Check that Off is selected for Wireless LAN >
Wireless LAN system in the camera setup menu
( 24).
3
Select PTP / IP for Wireless LAN > Mode ( 24).
4
In the top level of the wireless LAN menu, press the button to start
the Connection Wizard. A list of available connections will be displayed.
Press the multi selector up or down to highlight the desired connection
and press the multi selector to the right to select it.
³
·
»
³ Selected connection is marked with
icon.
· Infrastructure connections are marked with icon,
ad-hoc connections with icon ( 27).
» SS-ID (not displayed if SS-ID is unavailable).
Connection Not Available
If the desired connection is not listed, press the button to search again. If the
connection still can not be found, check settings on the network.


