


BMG7011 and BMG7012 User’s Guide Rev. 1.9
© Copyright, 2004 Oki Network Technologies. All Rights Reserved 5
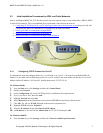
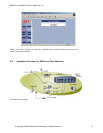
2.3 Initial Installation Procedures for ADSL and Cable Networks
Prior to installing the BMG7011/7012 into the network, the units must be setup to work within either a PPPoE, DHCP,
or Static IP environment. This is accomplished prior to placement of the unit into the network.
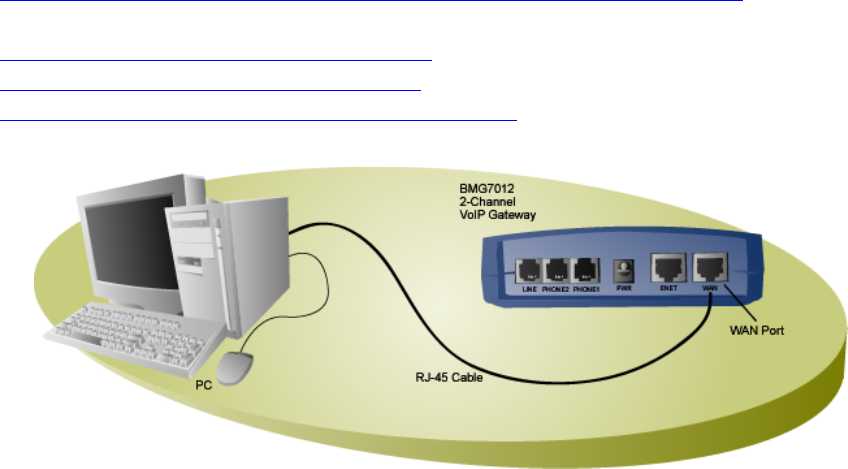
1. Configuring TCP/IP Protocol for your PC allowing for entry into web based setup screens
Steps involved with
configuring the BMG7011 and BMG7012 VoIP gateways in Supervisor Mode
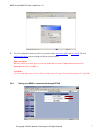
2. Setting your BMG to communicate through PPPoE
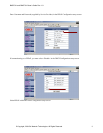
3. Setting your BMG to communicate through DHCP
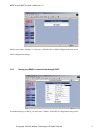
4. Setting your BMG to communicate through a Static IP address
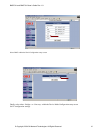
2.3.1 Configuring TCP/IP Protocol for Your PC
To communicate with and configure this device, you will need to set your PC ‘s IP protocol to the default BMG IP
Address. If you enable static IP addressing, make sure your PC resides in the same subnet with this device’s LAN IP
Address (default IP Address: 192.168.100.1, default subnet mask: 255.255.255.0).
For Windows 98/Me
1. From the Start menu, click Settings, and then click Control Panel.
2.
Double-click Network.
3.
On the Configuration tab, check if TCP/IP protocol is installed on the components list.
4.
If yes, go to Step 8. If no, then click
Add
.
5.
Highlight
Protocol
and click
Add
.
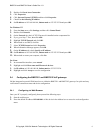
6. Select Microsoft from the Manufactures list and select TCP/IP from the Network Protocols list.
7.
Click OK. You will see TCP/IP displayed on the network components list.
8.
Highlight TCP/IP and click Properties.
9.
Select the
IP Address
tab and check
Specify an IP address
.
10. Set IP address as 192.168.100.100, Subnet mask as 255.255.255.0 and press OK.
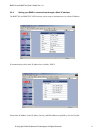
For Windows 2000/XP
1.
From the
Start
menu, click
Settings,
and then click
Network and Dial-up Connections
.