


GB
GB
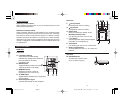
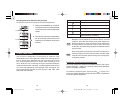
Remote Unit
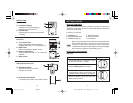
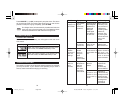
1. Locate the battery compartment at the back of the remote
unit (→ p.6,E.).
2. Remove the screws on the battery compartment using a
screwdriver (sold separately).
3. Insert two 1.5V alkaline AA batteries into the compartment, making
sure to align the polarities correctly as shown by the diagram.
4. Replace the Battery Door onto the Battery Compartment and
secure the screws.
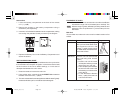
UNIT CALIBRATION & RESET
Before you use this product, you must calibrate the unit to synchronize
the transmission and reception of signals. It can also be used to reset
all the functions of the unit to default settings, or in the case of
discrepancies between the units values.
1. Place the remote unit next to the main unit.
2. Using a blunt stylus, press and hold the RESET Hole located at
the back of the main unit (→ p.5,H.).
3. The main unit searches for remote signals soon after the reset. Typically
the device will take up to four minutes to receive the signals.
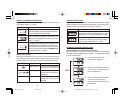
PLACEMENT OF UNITS
Position the remote unit and the main unit within the effective
transmission range of 20 to 30 meters (65 to 100 feet). The
effective range is greatly affected by building materials and
where the units are positioned. Try various setups for the
best result.
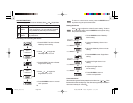
Main Unit
You can either mount the main unit on a wall or make it stand on a flat
surface.
NOTE
8 9
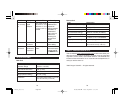
Method
Instruction
Diagram
Table Stand
The main unit is already equipped
with a pull-out Table Stand which
can support the unit on a flat
surface (→ p.5,K.). Simply pull out
the Table Stand and rest the main
unit on the surface.
Wall Mount
The main unit can be mounted
onto a wall using a No. 6 screw
(3.0mm).
a) Position and nail the screw
into the place where you would
like to hang your main unit.
b) Leave ample space between
the wall and the screw head
while testing to make sure the
nail is secure.
c) Fit the Wall-Mount Recess
Hole (→ p.5,I.) of the main unit
onto the screw head.
EMR898_GB(02/05) 12/1/03, 10:36 AMPage 10-11 Adobe PageMaker 6.5C/PPC