


GB
GB
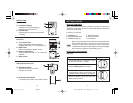
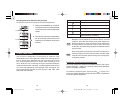
Remote Unit
Similarly, you can choose to either mount the remote unit on a wall or
make it stand on a flat surface.
It is recommended to place the unit away from direct sunlight, rain,
and snow.
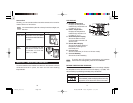
MAIN UNIT TEMPERATURE READINGS
Once the batteries are installed and the main and remote units are
calibrated and set in place, the main unit will start reading
temperatures.
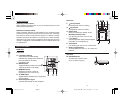
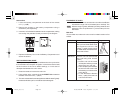
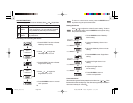
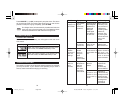
LCD DISPLAY
A. Remote Temperature
Displays the temperature
measured by the remote unit
(in either °F or °C).
B. Indoor Temperature
Displays the temperature
measured by the main unit
(in either °F or °C).
C. Radio Reception Display
Shows the status of clock
synchronization with the U.S.
Atomic Clock.
D. Kinetic Wave Display
Shows the receiving status of
temperature readings from
the remote unit.
E. Current Time
Shows current time (in 12-hour or 24-hour mode).
F. Current Weekday
Shows the current weekday.
To switch the LCD display s temperature unit between
Fahrenheit and Centigrade, press the
°F/°C Button.
INDOOR TEMPERATURE READINGS
The main unit also reads the temperature of its own surroundings. It displays
this temperature on the second line of the LCD display (→ p.11,B.). This
second reading is updated approximately every 78 seconds.
NOTE
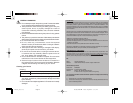
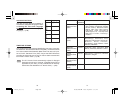
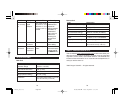
Method
Table Stand
The remote unit can be outfitted
with the Removable Table Stand
(→ p.6,H.).
Wall
Mount
Use no.6 screws with the
Wall-Mount Holder and fit
the remote unit onto the
holder (→ p.6,G).
Instruction
Diagram
NOTE
LCD Display Description
Soon after the batteries have been installed, the main
unit immediately reads and displays the surrounding
temperature on the second line of the LCD screen.
F
10 11
EMR898_GB(02/05) 12/1/03, 10:36 AMPage 12-13 Adobe PageMaker 6.5C/PPC