


10400276-003 06/2010 ©2010 Overland Storage, Inc. Page 5 of 6
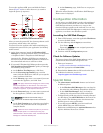
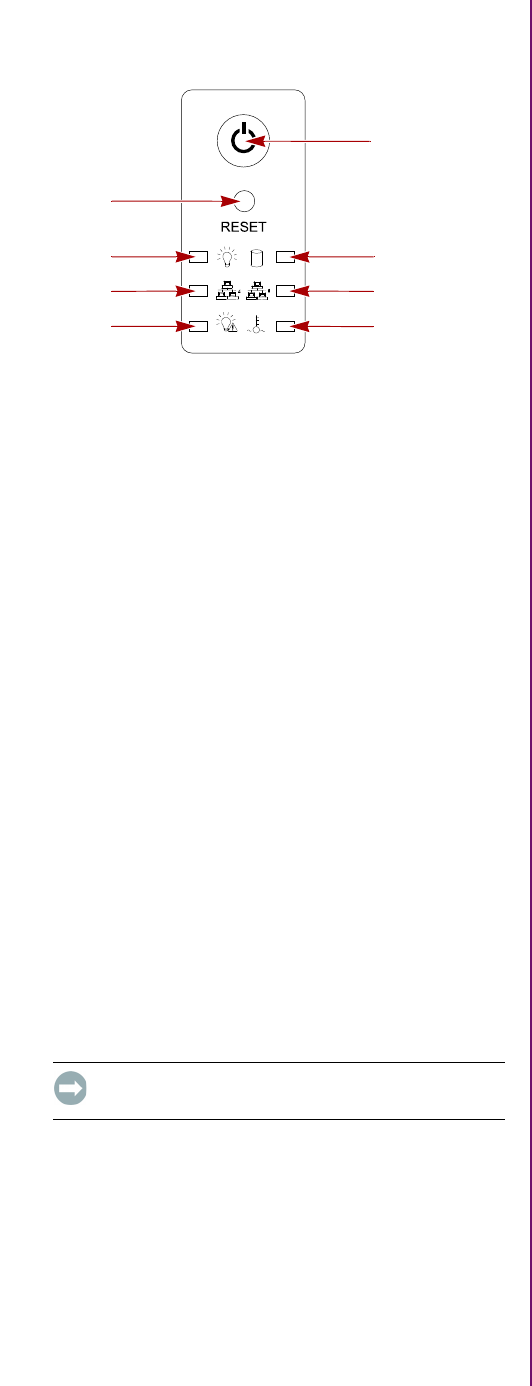
To turn the appliance ON, press and hold the Power
button (Figure 16) for no more than one (1) second to
begin the power-up sequence.
Figure 16. Front Panel Controls and Indicators
After you turn the power ON, the System performs a self-
test process, which takes a few minutes.
You must leave the appliance ON while completing any
configuration processes for your application and backup
media servers.
1. At the host computer, launch the Windows SAN
Manager by selecting Windows Start > All Programs
> SnapServer SAN > SnapServer SAN Manager.
Automatically, Windows SAN Manager attempts to
discover any new SAN S2000 appliances connected to
the subnetwork and tries to connect to them.
2. If successful, Windows SAN Manager then opens the
SAN Appliance Setup Wizard to guide you through
the following setup process:
a. At the Before You Begin page, click Next.
b. At the Licensing Agreement page, read the
terms, click the check box to indicate you accept the
terms, and then click Next.
c. At the Identity page, enter a new name if you want
to rename the appliance, and click Next.
NOTE:
We highly recommend changing the name to help
identify the appliance on the network. The name must
start with a letter; subsequent characters may be letters,
numbers or hyphens. Try to keep the name short.
d. At the Password page, you must enter a password
for the appliance, confirm it, and click Next.
IMPORTANT: Overland recommends using a
password of at least six alphanumeric characters.
e. At the Pool Creation page, select the type of policy
you want, and click Next. See the user guide for
complete details.
NOTE:
Select the Don’t Create Pool option if you want to
create multiple pools or to create a pool using only
selected disks in the enclosure. Later, use Windows SAN
Manager to create the desired pools.
f. At the Summary page, click Close to accept your
settings.
When the wizard finishes, the Windows SAN Manager
Home screen is displayed.
Configuration Information
At this point, your SAN S2000 is ready to be configured
for your specific environment and needs. The Windows
SAN Manager software provides easy access to the
Overland storage systems on the network. You can also
use the built-in SAN Web Manager to configure a specific
appliance, even from a non-Windows system.
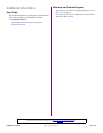
Launching the SAN Web Manager
1. From a Web browser, enter the applicable IP address
to access the SAN S2000.
2. Use the following default login (case-sensitive):
User Name: admin
Password: password (or new assigned password)
The Web GUI appears.
3. Continue with the configuration process.
Check for Software Updates
The latest release of the SAN S2000 software can be
obtained from the Overland Storage FTP site:
1. Point your browser to
ftp://ftp.overlandstorage.com/Software/Snap.
2. Open the appropriate version folder.
3. Download the latest software file based on the date.
For additional assistance, search at
http://support.overlandstorage.com/.
Special Notes
• The alarm mute and disable buttons can be found
in different places:
• In the Windows SAN Manager, they are found in
the tasks list under Manage SnapServer SAN Pool.
• In the SAN Web Manager, they are found by
clicking the subsystem name (link) under Pools.
• To help identify a disk drive that is currently allocated
as a Hot Spare, the red LED blinks on the front of its
drive carrier. This blinking action also denotes that
the Hot Spare is active and healthy.
• If your OS supports MPIO, you must install and
enable MPIO with your iSCSI initiator.
• Replication and Mirroring are optional features that
require additional licenses to activate.
Reset
Access
Power
NIC 2
Power
Fail
HDD
NIC 1
Overheat
/Fan Fail
Power
Button