


50
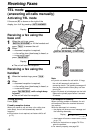
Receiving Faxes
Pager call - when the unit receives a fax or !
voice message!
This feature allows your unit to call your pager when your unit receives a fax document or an
incoming voice message.
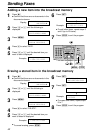
1
Press p.
Display:
2
Press #, then 70.
3
Press + or - to select “ON”.
●
If this feature is not required, select “OFF”.
4
Press w.
5
Enter your pager number up to 30 digits.
Example:
6
Press w.
7
Enter your pager access code up to 10 digits
if required.
Example:
PIN=12345678
NO.=12025551234
PAGER CALL
MODE=ON [±]
PAGER CALL
MODE=OFF [±]
SYSTEM SET UP
PRESS NAVI.[I H]
Note:
●
If
you have subscribed to a Caller ID service,
instead of the message you entered in
step 8, your pager will display the caller
’s
telephone number, followed by “11” or “22”.
11:
When your unit receives a voice message.
22: When your unit receives a fax document.
●
If you have not entered a message in step 8,
your pager will only display “11” or “22”.
8
Press w.
● The default code 07734 will
show “Hello!” on your pager.
● If you want to change this
message, enter your message
up to 30 digits.
9
Press w.
●
The unit will dial the stored
number.
10
Check that your pager received
the pager test call.
11
Press NO.
PAGER TEST
MSG.=07734
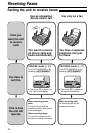
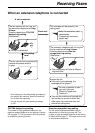
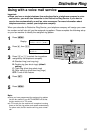
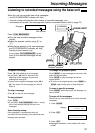
Extension telephone!
To the same line
Extension telephone
Note:
●
You can change the fax activation code in
feature #41 (p. 72).
If you use the fax machine with an extension telephone, you can receive fax documents using
the extension telephone. You do not have to press j on the fax machine.
Important:
●
Use a touch tone telephone as the extension telephone and enter the fax activation code firmly.
1
When the extension telephone rings, lift the
handset of the extension telephone.
2
When:
— document reception is required,
— a fax calling tone (slow beep) is heard, or
— no sound is heard,
press *9 (pre-selected fax activation
code) firmly.
3
Hang up the handset.
●
The fax machine will start reception.