


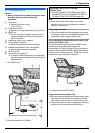

2. Preparation
21
For assistance, please visit http://www.panasonic.com/help
Initial Programming
2.7 Date and time
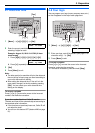
1 {Menu} i {#}{1}{0}{1} i {Set}
M:|01/D:01/Y:10
TIME: 12:00AM
2 Enter the current month/date/year/hour/minute by
selecting 2 digits for each.
Example: August 10, 2010 10:15 PM (12 hour
clock format)
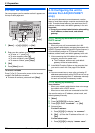
1. Press {0}{8} {1}{0} {1}{0} {1}{0} {1}{5}.
M:|08/D:10/Y:10
TIME: 10:15AM
2. Press {*} repeatedly to select “PM”.
3 {Set}
4 Press {Menu} to exit.
Note:
L The other party’s fax machine will print the date and
time on the top of each page you send according to
your unit’s date and time setting.
L After setting the date and time, if the unit is in the
copy mode, change it to the fax mode by pressing
{Fax}. You can check your unit’s date and time
setting on the display.
To correct a mistake
Press {<} or {>} to move the cursor to the incorrect
number, and make the correction.
If you have subscribed to a Caller ID service
The date and time will be automatically set according to
the received caller information.
L If the time has not previously been set, Caller ID will
not adjust the clock.
L You can turn this feature OFF (feature #226 on page
51).
2.8 Your logo
You can program your logo (name, company name, etc.)
so that it appears on the top of each page sent.
1 {Menu} i {#}{1}{0}{2} i {Set}
LOGO=|
2 Enter your logo, up to 30 characters (see page 61 for
character entry). i {Set}
3 Press {Menu} to exit.
To correct a mistake
Press {<} or {>} to move the cursor to the incorrect
character, and make the correction.
L To erase all characters, press and hold {Stop}.
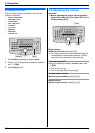
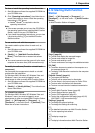
{<}{>}
{Set}
{Menu}
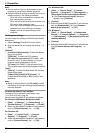
{Fax}
{<}{>}
{Set}
{Menu}
{Stop}