


ENGLISH-2726-ENGLISH
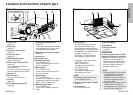
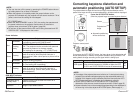
Power indicator
Power indicator status
Red
Illuminated
The projector is in standby mode and image projection
is possible by pressing the POWER button.
A picture is being projected.
The lamp is cooling down after the power is turned
off. (The cooling fan is operating.)
The projector is preparing for projection after the
power is turned on while the power indicator is
illuminated orange. (After a short period, a picture
will be projected.)
The projector is preparing for projection after the
power is turned on while the power indicator is
illuminated red. (After a short period, a picture will be
projected.)
Flashing
WEB STANDBY in the NETWORK menu is set to
“ON”. The projector can be controlled with personal
computers by means of a wireless network.
(The cooling fan is operating.) : PT-L735NTE only.
Flashing
slowly
Illuminated
Illuminated
Flashing
Green
Orange
Projector status
RGB INPUT indicator
RGB INPUT indicator status
Illuminated during
standby mode
A signal is being input to either the RGB1 IN or
RGB2 IN connector.
Illuminated during
projection
A signal is being input to the connector selected
using the input select buttons.
Projector status
NOTE:
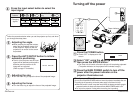
BYou can also turn off the power by pressing the POWER button twice or
by holding down it for at least 0.5 seconds.
BWhen the projector is in standby mode (the power indicator on the
projector is illuminated red), the projector will still draw a maximum 7 W of
power, even when the cooling fan has stopped.
(PT-L735NTE only)
BWhen the WEB STANDBY is set to “ON”, the cooling fan operates and
the power indicator on the projector flashes slowly in red and the
projector draw a maximum 30 W of power. (page 48)
BDo not turn off the power while the SD card is being accessed and “SD
CARD IN USE.” is displayed on the screen.
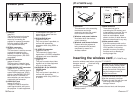
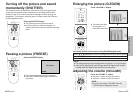
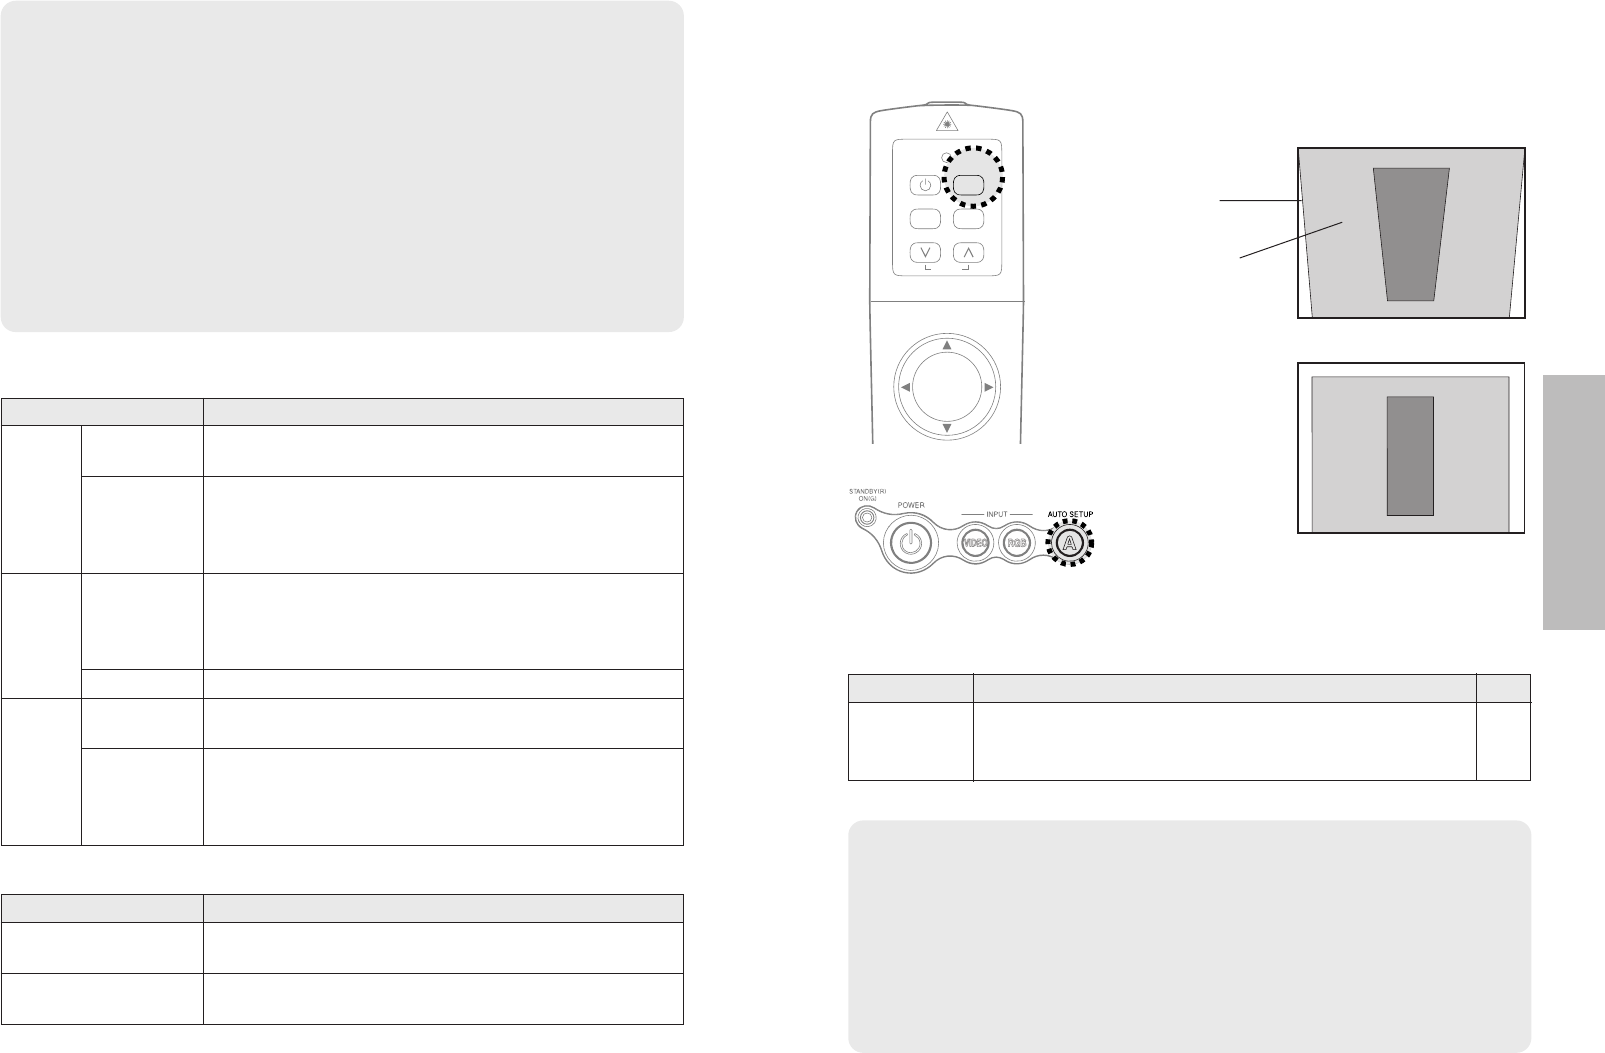
Correcting keystone distortion and
automatic positioning (AUTO SETUP)
This projector detects its degree of tilt and the input signal. Keystone distortion and the
position of the image can then be corrected automatically in accordance with the input signal.
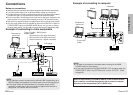
Projector control panel
Press the AUTO SETUP button.
(When the projected image has caused keystone distortion)
BAutomatic positioning
will be carried out.
Screen
Projected
image
If you press the AUTO SETUP button, the items given in the table below will
be set automatically in addition to keystone distortion being corrected. The
setting details change according to the signal which is being input.
[
NOTE:
B If the edges of the projected picture are indistinct, or if a dark picture is being
projected, the automatic setup processing may stop automatically before it is
complete. If this happens, project a different picture and then press the AUTO
SETUP button once more, or make the above adjustments manually.
B Set AUTO KEYSTONE in the OPTION menu to “OFF” to prevent any
deterioration of the picture as a result of keystone correction. (Refer to page 45.)
B Keystone distortion may not be corrected enough depending on the adjustment of
the zoom ring. In this case, adjust the KEYSTONE option. (Refer to page 41.)
Input signal Contents set up automatically
POSITION, DOT CLOCK, CLOCK PHASE
(If the dot clock frequency is 100 MHz or higher, the DOT
CLOCK and CLOCK PHASE will not be set automatically.)
RGB signals
Page
40,
41
LASER
MENUVIDEO
PAGE
RGB
POWER
AUTO SETUP
AUTO SETUP
Useful functions