17
Additional Hook Up Options
BNC and USB Set Ups
BNC
BNC
Connections
Connections
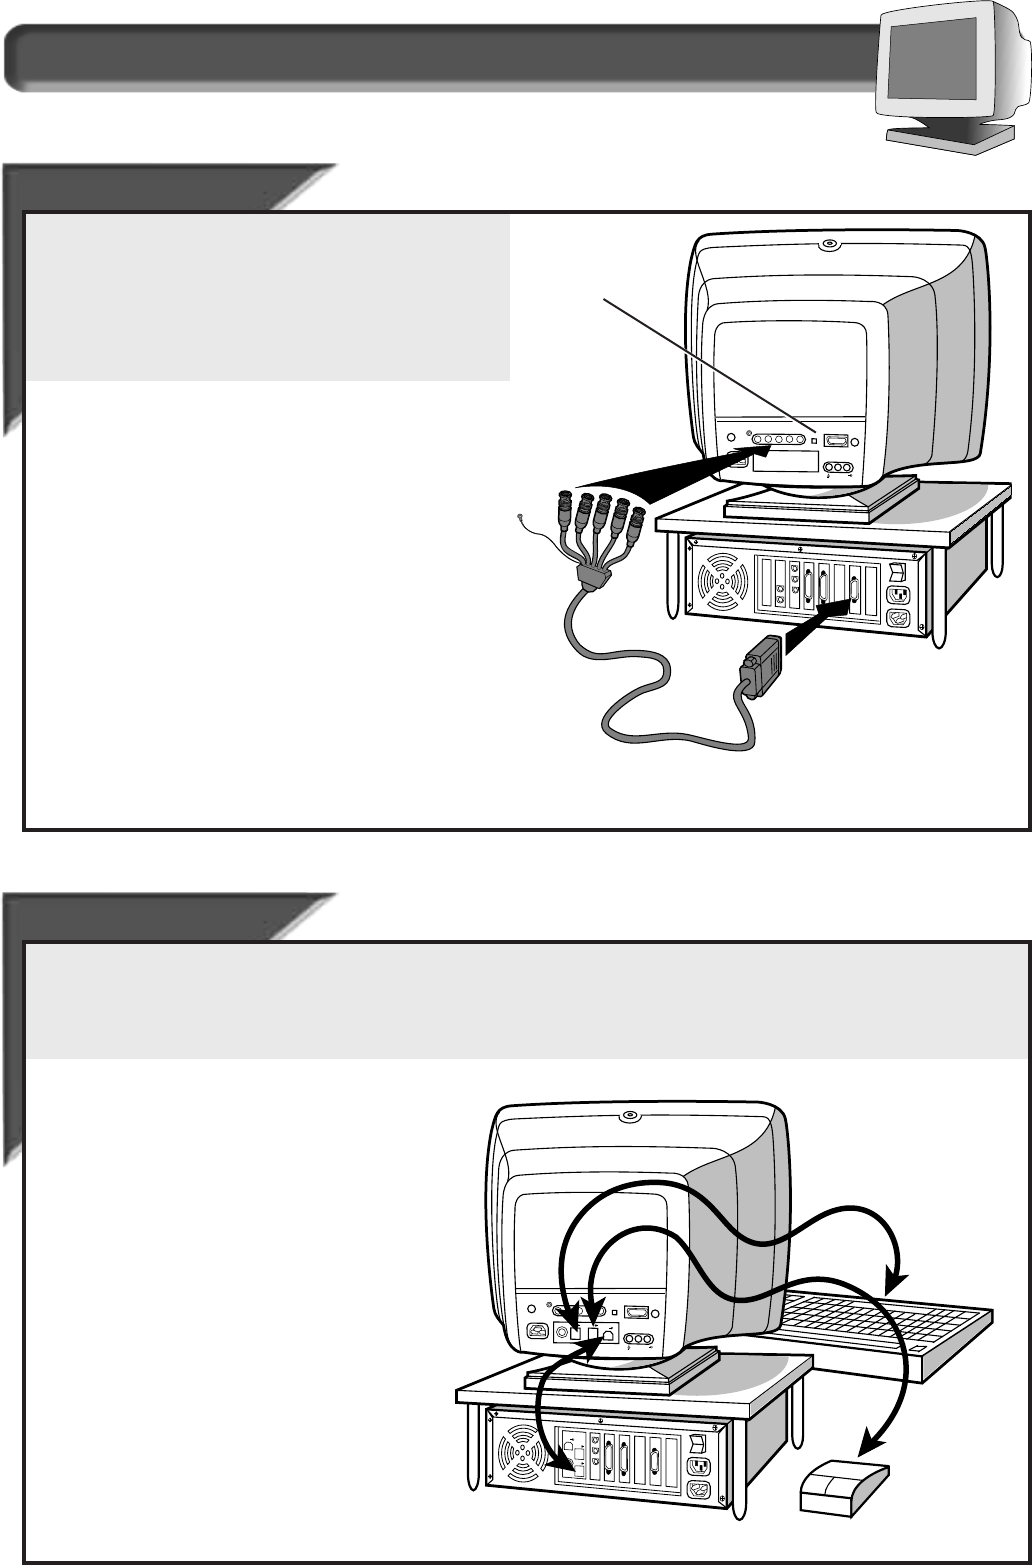
BNC is another way to connect the monitor to the computer. This
connection requires an optional BNC cable. It can be connected to
either a Macintosh- or IBM-compatible computer. For those who work
with graphics or designs, this option may be better.
Note: Be sure to flip the D-S
UB/BNC switch to BNC when using this
connection.
USB
USB
Connections
Connections
USB (Universal Serial Bus) is an innovation in connecting your IBM-compatible computer to your monitor. By using the USB,you will be able to connect
your keyboard, mouse, printer, and other peripherals to your monitor instead of having to connect them to your computer. This will give you greater
flexibility in setting up your system. Plus, you will have true plug-and-play capability. While the software is still being developed, Philips has included
the hardware so you will be ready to take advantage of this next generation in computer development.
H/H+VH/H+V VV
USBUSB
RR
GG BB
RR LL
ISD-SUBISD-SUB
USBUSB
USBUSB
BNC D-SUBBNC D-SUB
AUDIO INAUDIO IN
H/H+V V
USB
R
G B
R L
ISD-SUB
USB
USB
BNC D-SUB
AUDIO IN
USB
USB
USB
D-Sub/BNC
Switch
For an IBM-compatible computer:
1. Turn off the computer.
2. Connect the (optional) BNC monitor cable and set D-S
UB/BNC
switch to BNC.
3. Connect the power cable.
4. Turn on the monitor.Then turn on the computer.
5. If you have Windows ’95, follow the “If you have Windows ’95”
steps on the Setting Up foldout sheet.
For a Macintosh-type computer:
1. Connect the Mac adapter to one end of the monitor cable.
2. Turn off the computer.
3. Connect the (optional) BNC monitor cable and set D-S
UB/BNC
switch to BNC.
4. Connect the power cable.
5. Turn on the monitor.Then turn on the computer.
Refer to the “Setting Up your Philips monitor” foldout for a more detailed guide to setting up your monitor.
For an IBM-compatible Computer:
1. Turn off the computer.
2. Connect the (optional) USB Hub and cable to the
computer and to the monitor. (Computer must have
USB port.)
3. Connect the power cable.
4. Turn on the monitor.Then turn on the computer.
5. With the installation of the correct software, you will
be able to connect specially-made peripherals to the
monitor.
Note: USB Hub and cables sold separately. USB Bay
exists in back of monitor.
Refer to the “Setting Up your Philips monitor” foldout for a more detailed guide to setting up your monitor.


