


3
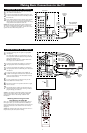
Making Basic Connections to the TV
Cable TV
DVI
G
S-VIDEO
G
S-VIDEO
RLV
RL
RL
RL
V
Pr Pb Y
RL
RL
Pr Pb Y
Pr Pb Y
RL
V
STANDARD/
HD INPUTS
STANDARD/
HD INPUTS
TUNER
RGB+HV
AV5 AV6
AV1MONSUB OUT AV2AV3AV4
OUT
SERVICE 1
2
C
DVI
G
S-VIDEO
G
S-VIDEO
RLV
RL
RL
RL
V
Pr Pb Y
RL
RL
Pr Pb Y
Pr Pb Y
RL
V
STANDARD/
HD INPUTS
STANDARD/
HD INPUTS
TUNER
RGB+HV
AV5 AV6
AV1MONSUB OUT AV2AV3AV4
OUT
SERVICE 1
2
C
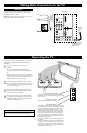
Back of TV
Incoming
Cable TV
Signal
Connect the incoming cable
TV signal to the TUNER
jack on the back of the TV.
Connect the cable TV signal to the TUNER jack on the back of
the TV. See page 8 for details on using Autoprogram to store chan-
nels in the TV’s memory.
NOTE: This connection will supply stereo sound to the TV if it is
being broadcast by the station you are watching.
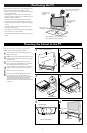
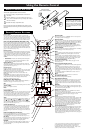
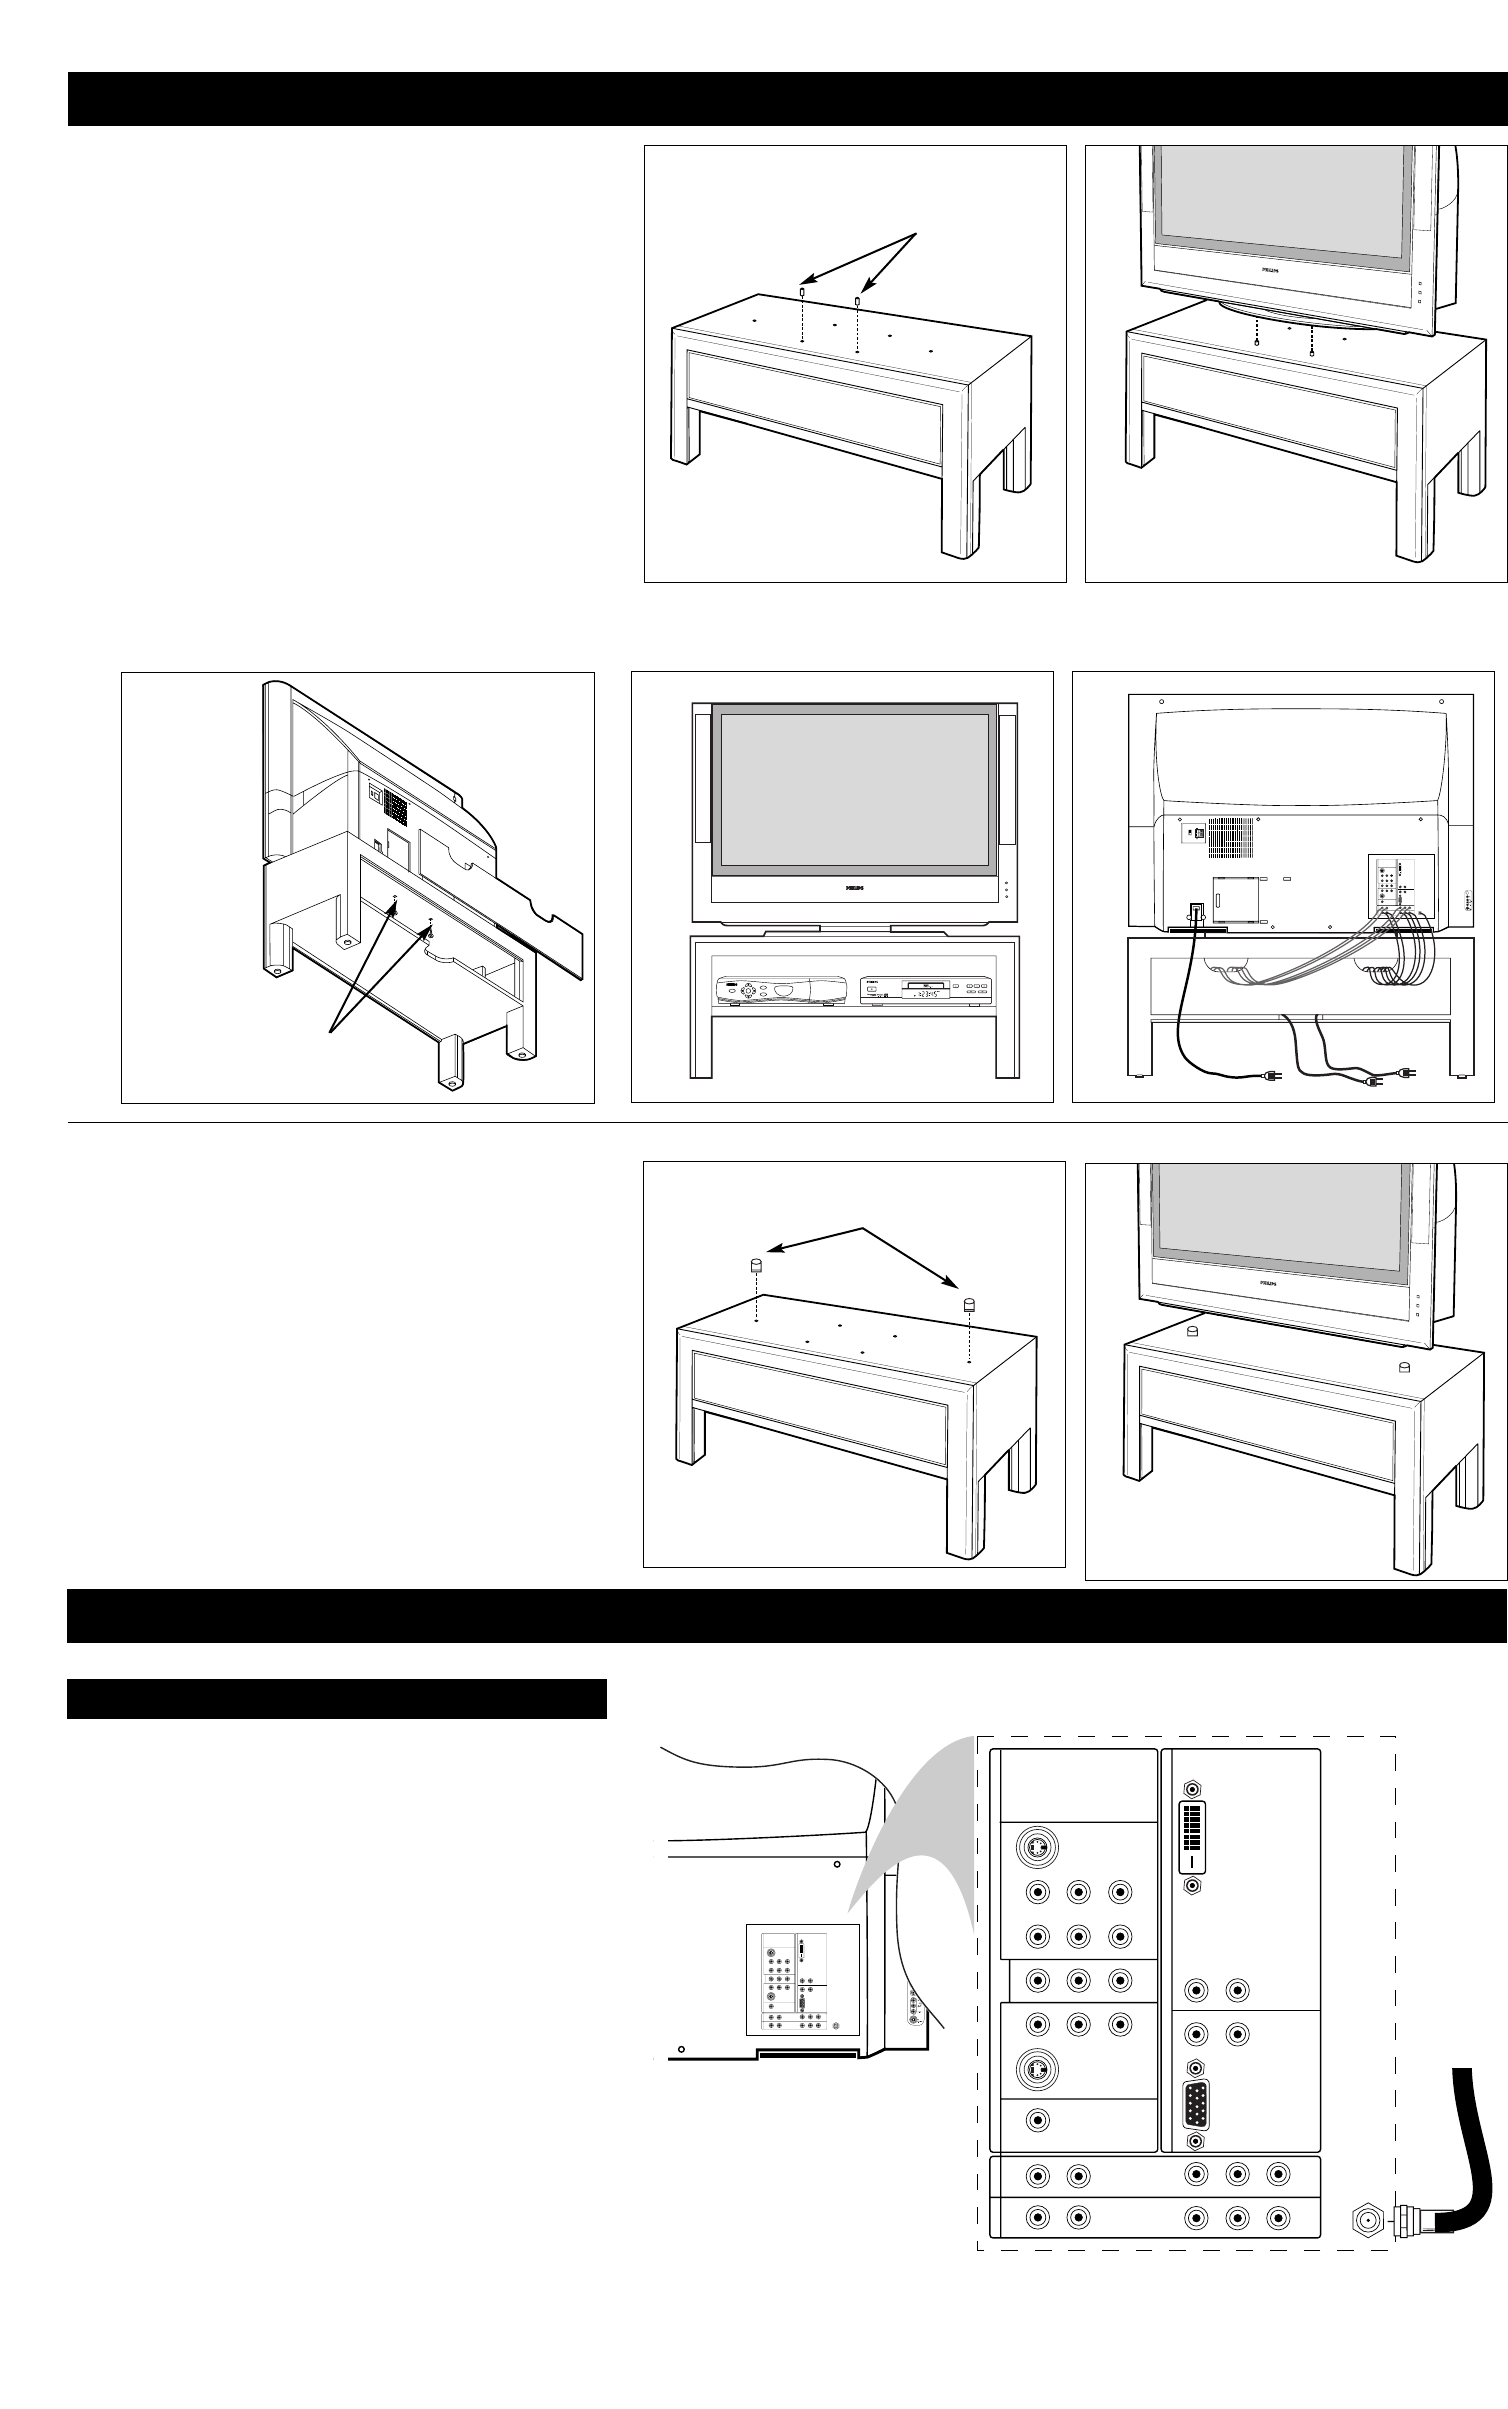
Mounting the Swivel and TV to the Stand
1
POWER
SELECT
GUIDE
INFO
HIGH DEFINITION
POWER
OPEN/CLOSE
STANDBY-ON
STOP
PREV NEXT
PLAY PAUSE
DVD619 DVD/CD PLAYER
DVI
G
S-VIDEO
G
S-VIDEO
RLV
RL
RL
RL
V
Pr Pb Y
RL
RL
Pr Pb Y
Pr Pb Y
RL
V
STANDARD/
HD INPUTS
STANDARD/
HD INPUTS
TUNER
RGB+HV
AV5 AV6
AV1MONSUB OUT AV2AV3AV4
OUT
SERVICE 1
2
C
C
E
N
T
E
R
C
H
A
N
N
E
L
A
M
P
IN
P
U
T
INT
EXT
Screws
Positioning
Pins
2
3
4 5
Placing the TV on the Stand
without the Swivel
If you should decide not to purchase the optional swivel, you can
place the TV directly on the stand.
• First locate the nut and washer for each supplied rubber locator
(2).
• Place the rubber locators over the pre-drilled holes in the stand.
• Place the washer and nut on each rubber locator.
• Tighten each nut.
• Place the TV and mounted swivel on the stand, aligning the
front and sides of the TV with the front and sides of the stand.
This will help properly seat the TV. The rubber locators will
prevent the TV from sliding.
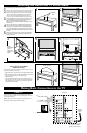
Rubber Locators
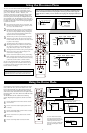
NOTE:
Installing these
screws
reduces the
risk of the TV
sliding.
1
Install the plastic position pins in the stand.
2
Place the TV and mounted swivel on the stand, aligning the
front and sides of the TV with the front and sides of the
stand. This will help properly seat the TV on the position-
ing pins and align the pre-drilled holes on the stand and
swivel. You do not need the rubber bumpers and long
screws if you have already attached the swivel to the TV.
3
Use the supplied screws (2) and screw key to fasten the swivel to
the stand. Install the back cover by sliding it up into the groove
above the opening, then slide into the lower groove.
Note: If accessories and cables protrude from the stand, leave the
back cover off.
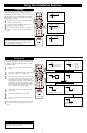
4
Place accessory devices—HD satellite receiver, cable box, DVD
player, or VCR, for example—inside the stand. (See below and
Directions for Use manual for connection information.) Route the
power cords through the opening in the bottom of the stand shelf,
and route the connection cables through the openings in the back of
the stand.
5
Before swiveling the TV, make sure you have left enough slack in
the cords of any connected accessory devices. This will prevent
damage to the cords.