


EPSON DFX-8500
5/98 EPSON DFX-8500
- 11
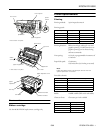
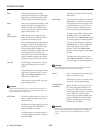
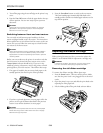
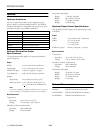
4. Pull up on the side of the ribbon cartridge as shown below
to release it from the printer’s mounting pins. Remove the
cartridge by lifting it up and away from you.
c
CAUTION:
Make sure you don’t pull on the flat gold cable beneath the
ribbon cartridge.
Installing the new ribbon cartridge
Before installing the ribbon cartridge, make sure that the
protective packing materials have been removed. Remove the
ribbon cartridge from the box and plastic bag. Then follow
these steps:
w
WARNING:
Never move the print head while the printer is turned on unless
instructed to because this can damage the printer. Also, if you
have been using the printer, the print head may be hot; let it
cool for a few minutes before touching it.
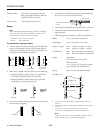
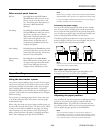
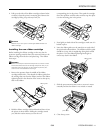
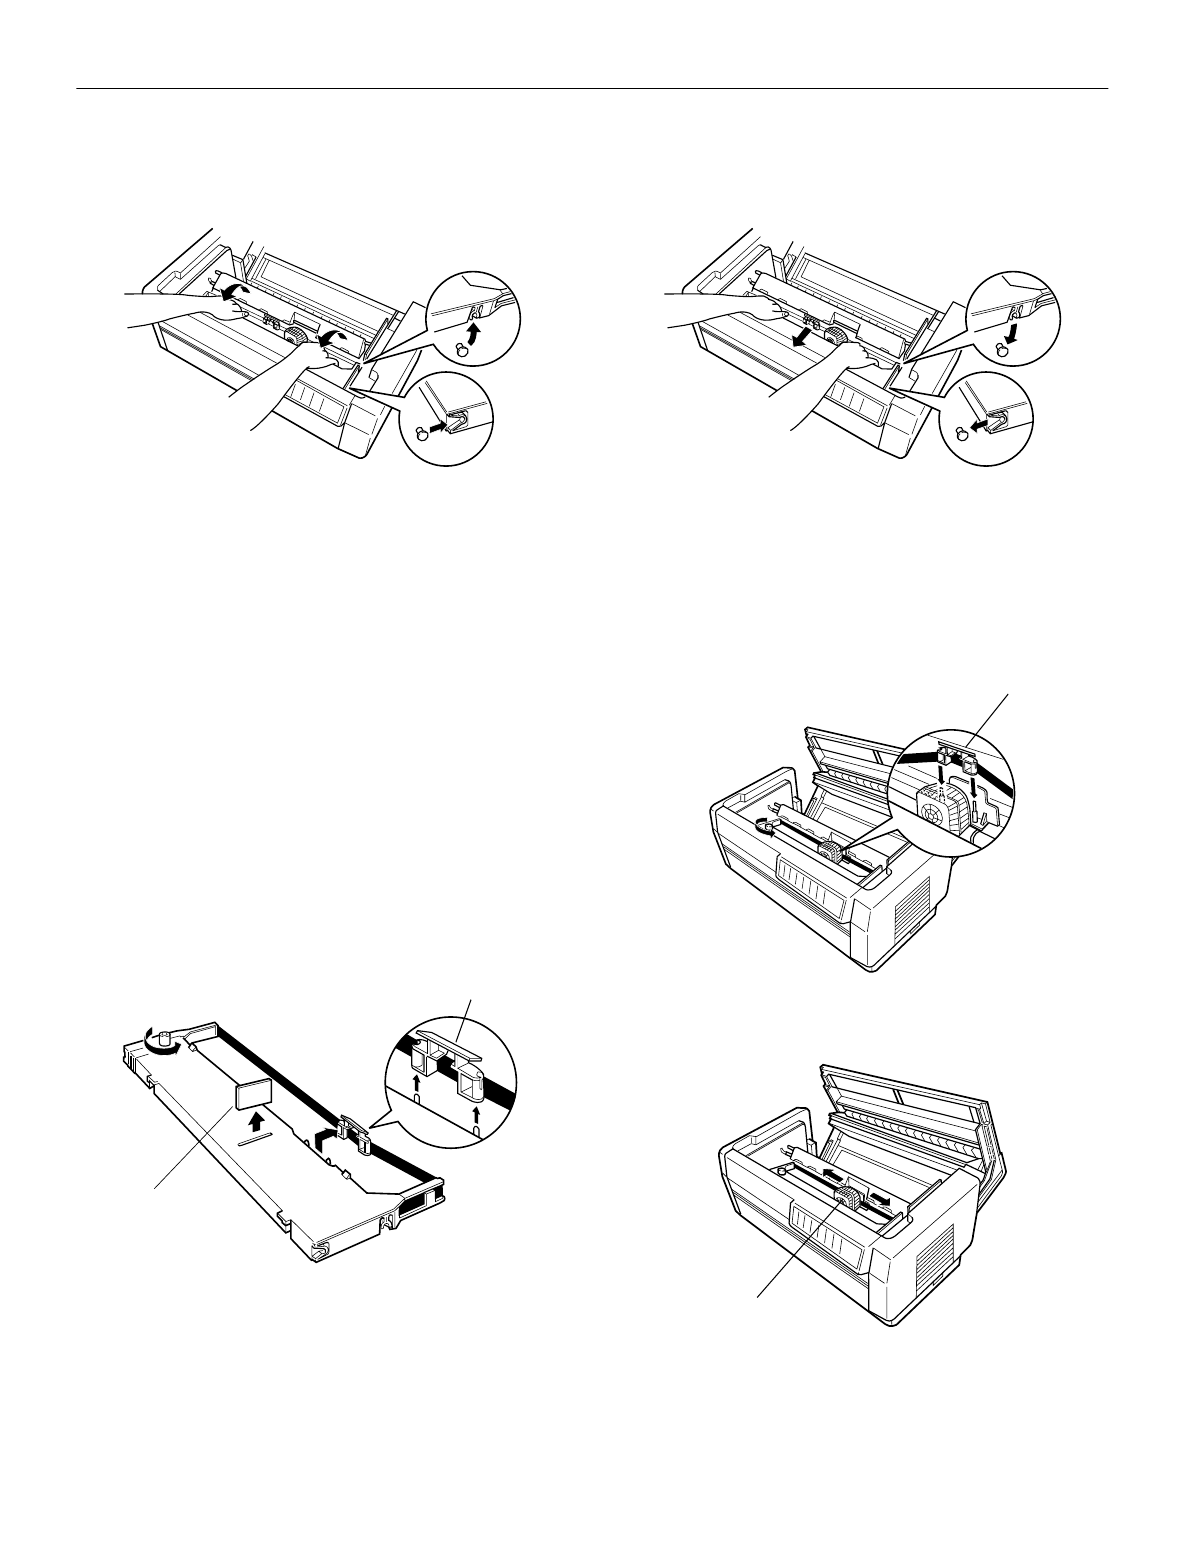
1. Remove the separator from the middle of the ribbon
cartridge and discard it. Then detach the ribbon guide from
the cartridge (but not from the ribbon) and turn the ribbon-
tightening knob in the direction of the arrow to take up any
slack in the ribbon.
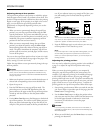
2. Hold the ribbon cartridge with both hands and lower it into
the printer as shown below. Pulling the cartridge toward
you, slide the notches nearest you over the two
corresponding pins in the printer. Then push the cartridge
down into position until the other two slots snap into place
over the mounting pins in the printer.
3. Press lightly on both sides of the cartridge to make sure it is
locked in place.
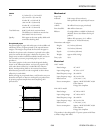
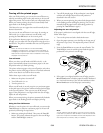
4. Insert the ribbon guide over the metal pins on each side of
the print head as shown below. The smaller end of the guide
should be on top, with its angled edge facing back toward
the platen. Turn the ribbon-tightening knob again to
remove any slack in the ribbon.
5. Slide the print head from side to side to see that it moves
smoothly and that the ribbon is not twisted or creased.
6. Close the top cover.
separator
ribbon guide
ribbon guide
print head