


EPSON DFX-8500
5/98 EPSON DFX-8500
- 7
Other control panel features
Paper Handling
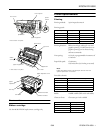
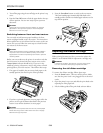
Using the two-tractor system
Your printer’s paper handling system consists of a front push
tractor and a rear push tractor. Both tractors are easy to load
and operate, and both accommodate a wide variety of paper
types, including labels and multi-part forms. The printer
automatically adjusts to the thickness of your loaded paper, so
you don’t need to make any manual adjustments to the paper
thickness settings.
You can print on continuous paper from 4 inches (101 mm)
to 16 inches (406 mm) wide. Your printer senses the paper
width automatically.
When using more than two types of paper, load the paper you
use most often onto the front tractor. The front tractor, which
is easier to reach, will be available for the paper you change
more frequently. Use only the front tractor for printing on
labels, continuous forms with labels, overlapping multi-part
forms, and overlapping multi-part forms with labels.
Note:
Before using your paper, check that it matches the specifications
described earlier. Also make sure your paper has a straight edge.
If continuous paper is fed past the sprocket (on the last page, for
example), the paper may not feed properly.
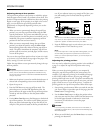
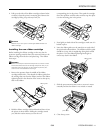
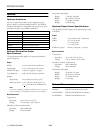
Positioning the paper supply
You can load continuous paper from both the front and the
rear, so be sure to leave enough room around the printer for
the two stacks of fresh paper and for the printed stack. Make
sure you align your paper supply with the paper loaded in the
tractor so the paper feeds smoothly into the printer.
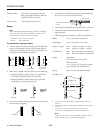
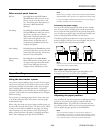
The following illustration shows three ways to position your
printer and paper: with the front tractor loaded, with the rear
tractor loaded, and with both tractors loaded.
Note:
Make sure that your stack of printed pages does not interfere
with the rear tractor’s paper supply.
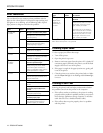
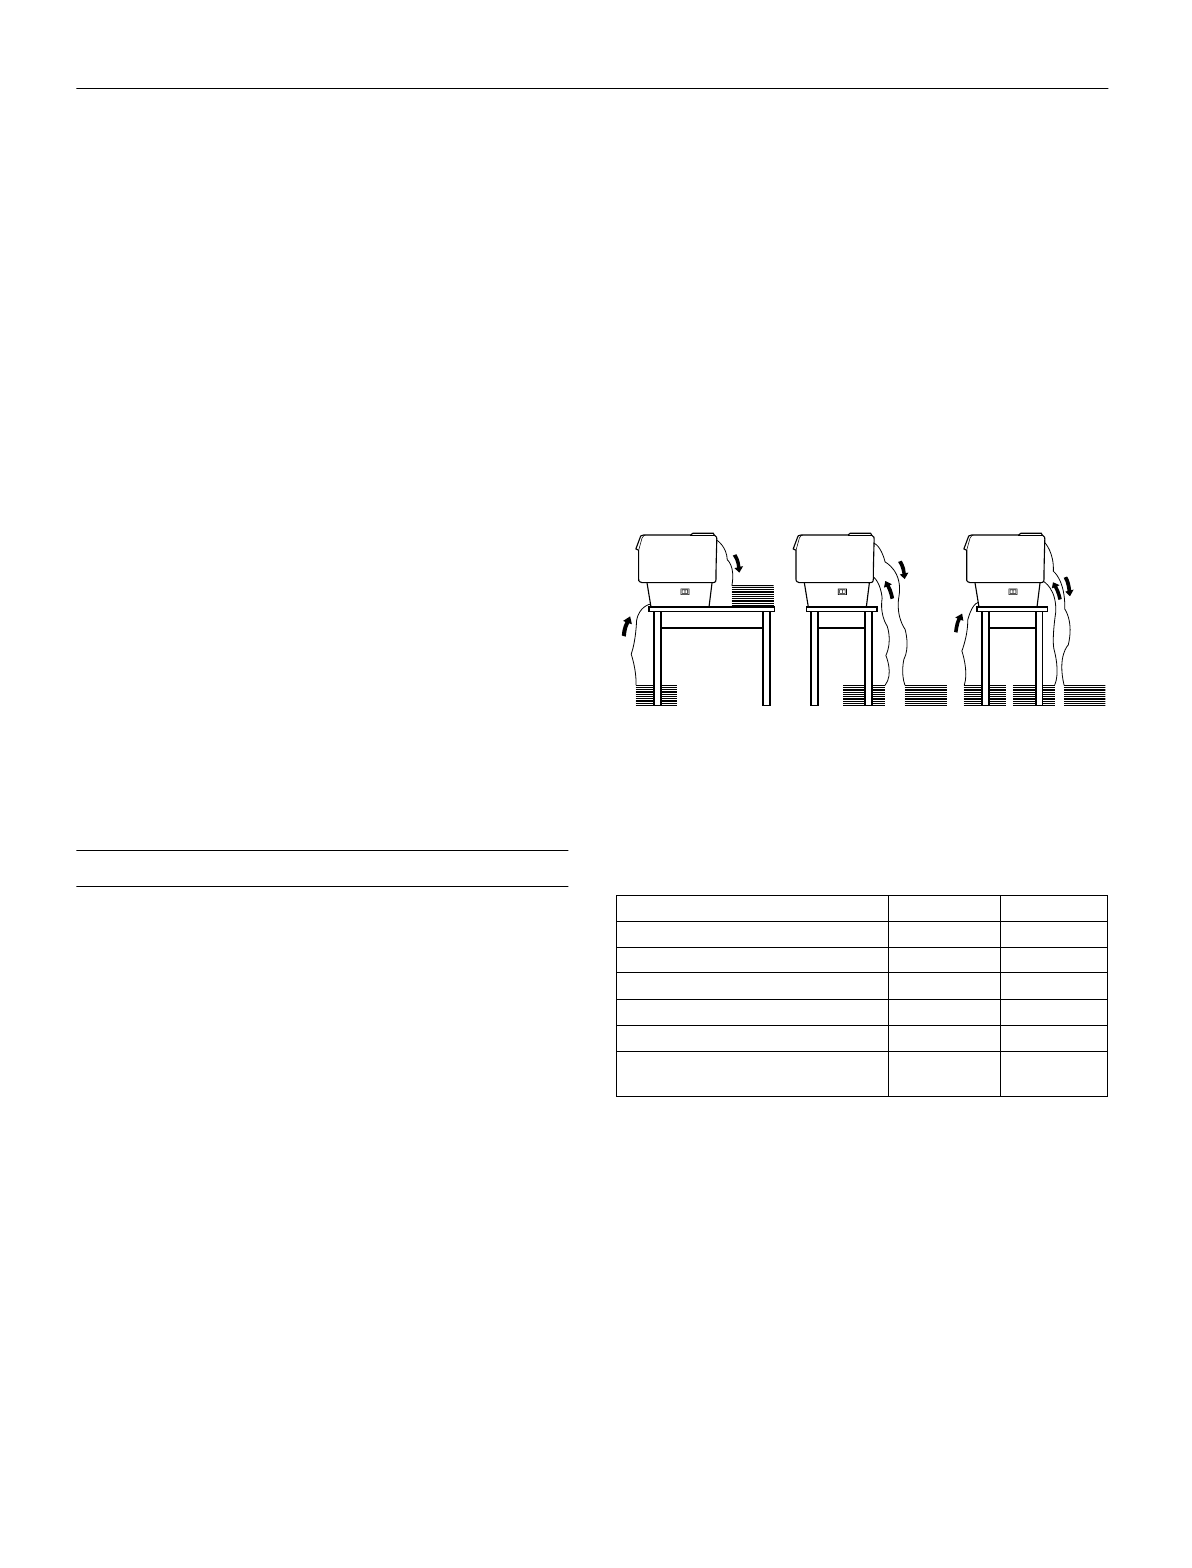
What paper types you can use
You can use the continuous paper types listed below. (For
some paper types, the rear tractor is not available.)
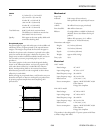
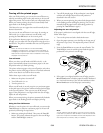
Adjusting the paper position
You can adjust the top-of-form position as well as the printing
position at any point on the page by using the
TOF and
Micro Feed buttons. The printer then remembers the new
top-of-form position. When you use the optional pull tractor,
you can adjust the paper position as described below.
Note:
The printing position (based on the top-of-form position) is
controlled by your software. To change the print position, adjust
your software’s print settings. Use the following procedure only
if your software does not allow print position adjustment.
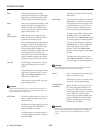
Self test By holding down the LF/FF Load or
Tear Off button while you turn on the
printer, you can start the printer’s self
test. The self test prints the characters in
the printer’s ROM (Read Only
Memory).
Hex dump By holding down both the
LF/FF Load
and
Tear Off buttons while you turn on
the printer, you can turn on the hex
dump mode. This feature prints the codes
that are sent to the printer so that
advanced users can find the cause of
communication problems between the
computer and printer.
Print settings By holding down the
Pause button while
you turn on the printer, you can print the
current DIP switch settings. See the next
section for more information.
Paper memory
setting
By holding down the
Paper Select
button while you turn on the printer, you
can register the paper form information
when you use multi-part forms that
overlap or forms with labels on them.
Continuous Paper Types Front Tractor Rear Tractor
Single-sheet available available
Multi-part available available
Labels available not available
Continuous forms with labels available not available
Overlapping multi-part forms available not available
Overlapping multi-part forms with
labels
available not available