


INSTALLATION
EATON Powerware
®
BladeUPS
®
EBM User's Guide S 164201650 Rev 2 www.powerware.com
17
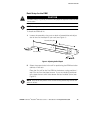
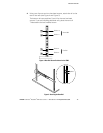
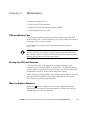
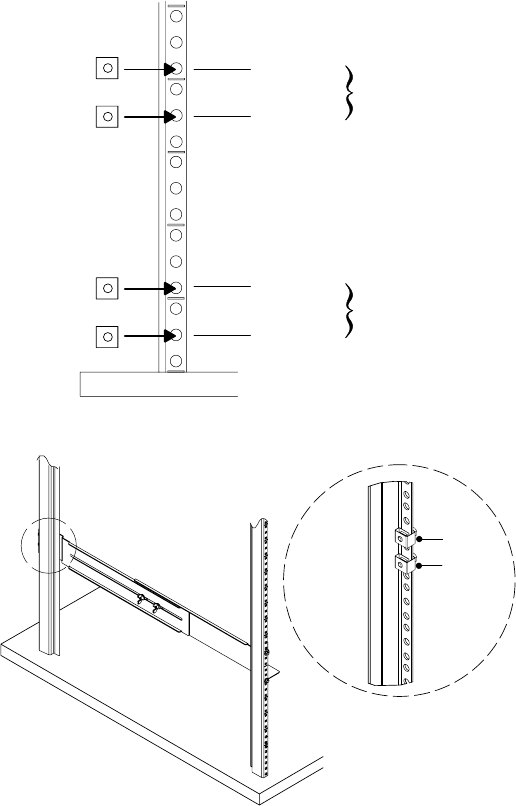
4. Using two clip nuts and two hex-head screws, attach the rail to the
rear of the rack (see Figure 4 and Figure 5).
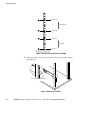
The bottom rail uses positions 2 and 4 for the rear hex-head
screws. If you are installing additional rails, place the next rail
7 holes above the last installed screw.
Position 2
Position 4
Position 11
Position 13
First Rail
Second Rail
Figure 4. Rear Rail Screw Positions for the EBM
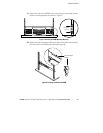
Clip Nuts
Figure 5. Securing the Rear Rail