


CPD10WALLARM
Installation Instructions Visit Premier Mounts website at http://www.mounts.com Page 7
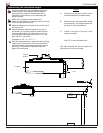
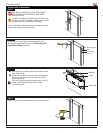
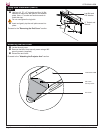
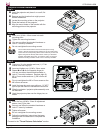
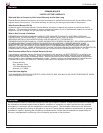
Locate the mounting hook cutout on the top of the
wall plate.
Tilt the arm slightly and gently insert the mounting
hooks into the mounting hook cutouts.
Slowly lower and let the projector arm rest against
the wall plate.
If using the storage feature of the product, it may
be easier to route any wiring at this time (please
see the "Cable Management" section).
MAKE SURE THE PROJECTOR ARM IS FULLY
SEATED BEFORE RELEASING THE UNIT.
Attaching the Projector Arm
Mounting Hook
Cutout
Mounting Hooks
CPD10WALLARM
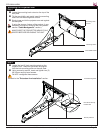
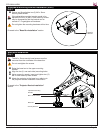
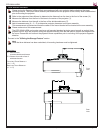
Locate the two (2) lock mounting points on the
projector arm. These two points will be aligned
with the lock mounting points on the wall plate.
Using a security wrench, insert and tighten two (2)
M5 x 8mm security head screws.
Do NOT overtighten these screws.
Proceed to the "Extension Arm Installation" section.
Lock Mounting Point
M5 x 8mm Security
Head Screw
Security Wrench
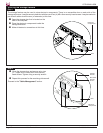
Step 1
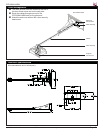
Step 2