


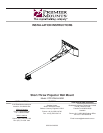


CPD10WALLARM
Page 8
Visit Premier Mounts website at http://www.mounts.com Installation Instructions
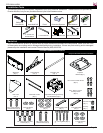
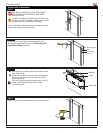
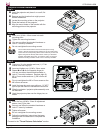
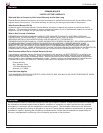
Slide the extension arm into the open end of the CPD10WALLARM (the front of the mount).
Adjust length so that the center of the adjustable mounting bracket matches the throw distance calibration.
Line up the mounting holes on the extension arm with the mounting slots on the CPD10WALLARM.
Using a screwdriver, insert and fi nger-tighten two (2) M6 x 12mm security head screws and M6 fl at washers
through the external slide plate.
Attach the projector.
Proceed to the "Adjustable Mounting Bracket Installation" section.
M6 x 12mm Security Screw
Security Wrench
M6 Flat Washers
CPD10WALLARM
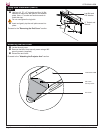
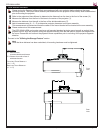
Please see the Operator’s Manual to determine the correct throw distance (the distance from the projector to the
screen). The throw distance must be determined prior to mounting the projector.
External Slide Plate
Extension Arm
Extension Arm Installation
External
Slide Plate
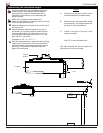
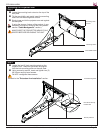
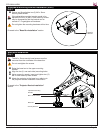
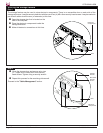
Raise the adjustable mounting bracket into
position.
Align the mounting holes of the upper mounting
plate with the mounting holes on the projector
arm.
Four (4 - two per screw) ¼˝ nylon washers must
be placed between the adjustable mounting
bracket and the projector arm (see illustration to
the right).
Adjustable Mounting Bracket Installation
Step 1
CPD10WALLARM
Adjustable
Mounting
Bracket
M6 x 25mm
Security Screw
¼˝ Nylon
Washer
Upper Mounting
Plate