22 Using the CD/DVD Printer 6 with Windows
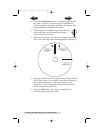
5. Once processing is complete, the printer will begin to print.
Print time will vary depending on whether you are
printing with color or monochrome cartridges and on
which Print Quality setting you selected. When printing is
complete, the Disc Tray will automatically open and
remain fully extended until the next print job is received.
D. CREATING A PRINT FILE (*.PRN)
If you are using the CD/DVD Printer 6 with a duplication
system, it may be necessary to print your image to a *.PRN file
on your hard drive. This is also useful for a print job that
doesn't change and has to be printed often. This is because a
print (*.PRN) file contains the bit-for-bit information that is to
be printed to the disc surface.
A print file is created in most applications by selecting a Print
to File option in the Print Dialog Window. If your application
does not have a Print to File option, you must change the
printing port under the printer properties to set it to File rather
than a LPT or USB port. This is done as follows:
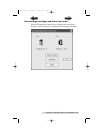
1. Click the Start button, point to Settings, and select Printers.
2. Right-click the CD/DVD Printer 6 icon from the Printers
Folder and select properties.
3. Select the ports tab and select the "File" option.
You are now ready to create a print file. First, make certain you
have your driver properties (i.e. cartridge type, print
resolution, color matching, etc) set the way you want them.
Please note that a print file has all driver settings built into that
file at the time of creation. Once this file is created it cannot be
changed. For example, if a print file was created with the
cartridge type set to color, you can only print using a color
cartridge. If you change to a monochrome cartridge, the print
file will not work. You would have to recreate the print file
with the driver properties set to monochrome in order for it to
work properly.
510901.qxd 5/26/2004 11:21 AM Page 22
TOC
INDEX


