


VTrak E-Class Quick Start Guide
34
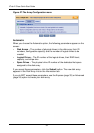
Advanced
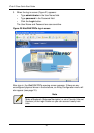
When you choose the Advanced option, the Step 1 – Disk Array Creation screen
displays.
1. Enter a name for the disk array in the field provided.
2. Check the box to enable the following features.
• Media Patrol – A routine maintenance procedure that checks the
magnetic media on each disk drive. Media Patrol is concerned with the
condition of the media itself, not the data recorded on the media.
• PDM – Predictive Data Migration (PDM) scans the bad sector
remapping table of the disk drives assigned to a logical drive. When the
table fills to a specified percentage of its capacity, PDM triggers a
migration of data from the suspect drive (the disk drive with the bad
sectors) to a spare disk drive.
3. Highlight the physical drives you want in the disk array from the Available list
and press the >> button to move them to the Selected list.
You can also double-click them to move them.
4. When you are done, click the Next button.
The Step 2 – Logical Drive Creation screen displays.
5. Enter an Alias (name) for the first logical drive.
6. Choose a RAID level from the dropdown menu.
The choice of RAID levels depends on the number of physical drives you
selected.
7. RAID 50 and 60 only. Choose the number of axles from the dropdown menu.
8. Specify a Capacity and the unit of measure (MB, GB, or TB).
This value will be the data capacity of the logical drive. If you specify less
than disk array’s maximum capacity, the remainder is available for additional
logical drives.
9. Specify a Stripe size from the dropdown menu.
64, 128, 256, 512 KB, and 1 MB are available. 64 KB is the default.
10. Specify a Sector size from the dropdown menu.
512 Bytes, 1, 2, and 4 KB are available. 512 Bytes is the default.
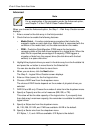
Note
For an explanation of the parameters under the Advanced option,
see Chapter 7 of the VTrak E-Class Product Manual.