


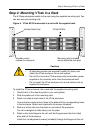
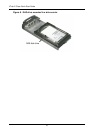

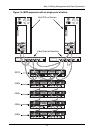

Step 2: Mounting VTrak in a Rack
5
Step 2: Mounting VTrak in a Rack
The E-Class subsytems installs to the rack using the supplied mounting rails. You
can also use your existing rails.
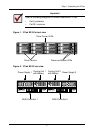
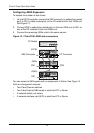
Figure 4. VTrak E310f/s mounted in a rack with the supplied rails
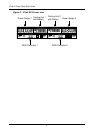
To install the VTrak enclosure into a rack with the supplied mounting rails:
1. Check the fit of the mounting rails in your rack system.
2. Slide the plates out of the mounting rails.
3. Attach one plate to each side of the VTrak enclosure.
Line-up the two studs and six holes in the plate with the corresponding holes
in the enclosure. Attach each plate with six screws (included).
4. Slide one of the rails over the plate on one side of the enclosure.
The rail is designed to slide freely over the plate.
5. Attach a four-hole flange to the rail, with the flange toward the front (disk
drive end) of the enclosure.
Install four rail adjustment screws (included) through the flange into the rail.
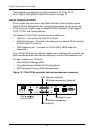
Cautions
• At least two persons are required to safely lift, place, and
attach the VTrak enclosure into a rack system.
• Do not lift or move the VTrak enclosure by the handles, power
supplies or the controller units. Hold the enclosure itself.
• Do not install the VTrak enclosure into a rack without rails to
support the enclosure.
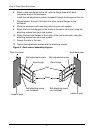
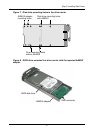
Vertical Rack Post
VTrak E310f/s
Mounting rails (included)
mount inside the rack post
Handles mount
outside the rack post