6
English
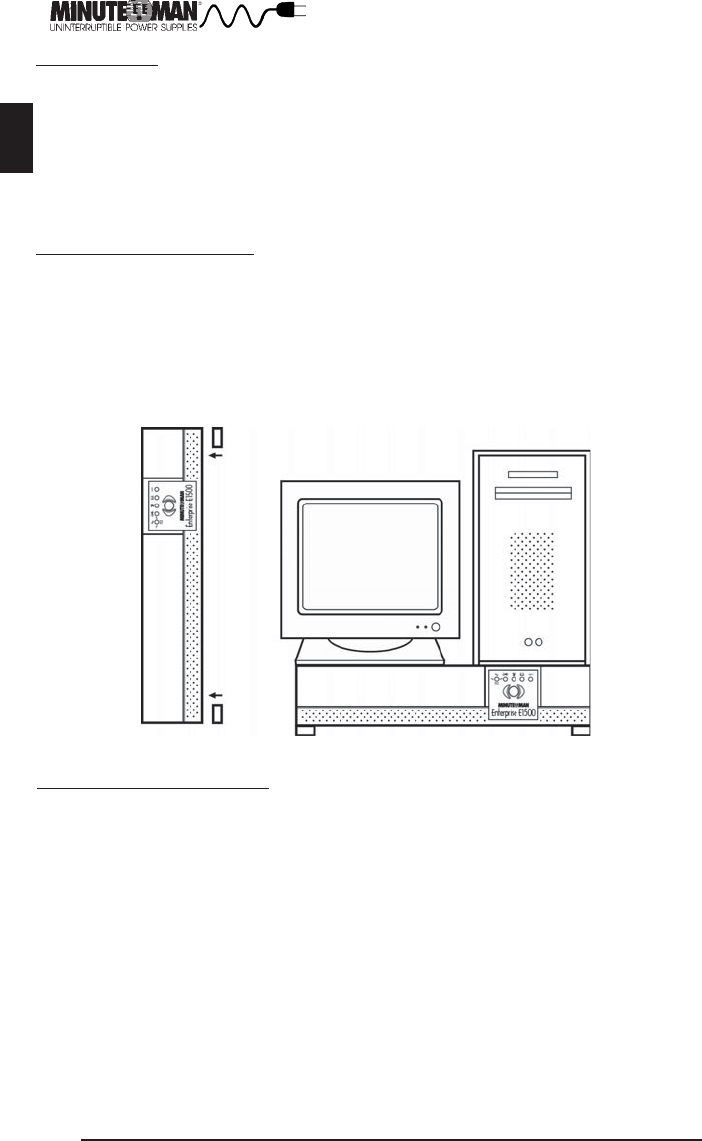
The Desk Top Configuration allows the user to install the monitor, the computer and the
UPS in one single stack. There are four self-stick rubber feet provided with UPS. The four
rubber feet can be installed on the bottom side of the UPS. Use CAUTION, the UPS is
extremely heavy. Once the location of the UPS has been determined, stand the UPS on it's
side. Attach the self-stick rubber feet to the bottom of the UPS, approximately 2" from each
corner. Lay the UPS down on the four rubber feet. Stack the computer and then the monitor
on top of the UPS. NOTE: Do not stack the UPS on top of the computer. The UPS is heavy
and may damage the other equipment. Now the UPS is ready for the normal start-up
procedure.
INSTALLATION
Be sure to read the installation placement and all the cautions before installing the UPS. The
Enterprise series UPS has external Battery Pack capability, please observe the following
warning when connecting the Battery Pack(s). WARNING! DO NOT PLUG THE BATTERY
PACK'S POWER CORD INTO THE UPS's OUTPUT RECEPTACLES, DAMAGE TO THE BATTERY
PACK'S INTERNAL CHARGER MAY OCCUR. NOTE: The red connector is the battery
positive(+) and the black connector is the battery negative(-) on all MINUTEMAN configura-
tions. The Enterprise series UPSs can be installed in four different configurations.
The Wall Mount Configuration allows the user to mount the UPS on the wall. There is a
wall mount bracket kit available for the UPS. The kit includes two mounting brackets, twelve
retaining screws, four bolts, one drill bit and the template for the bolt holes. Use CAUTION,
the UPS is extremely heavy. The UPS's side panels have mounting bracket screw holes for
attaching the wall mounting brackets. Once the location and position of the UPS has been
determined, lay the UPS down flat. Align the mounting bracket with the mounting bracket
screw holes and attach with the retaining screws. Use the template to mark the bolt hole
position on the wall. CAUTION, you should always were protective gear for your hands
and eyes when operating power tools. Drill the holes for the bolts and make sure that all of
the holes are drilled into structural material. Then clean the area of any loose material.
Install the four bolts into the bolt holes. Do not tighten the bolts all the way, leave approxi-
mately 3/8" of the bolt sticking out. Position the UPS, so that the mounting bracket keyed
holes line up with the four bolts. Slide the UPS down until its resting securely on the four
bolts. Tighten the four bolts to secure the UPS to the wall. The face plate can be rotated to
read in the up-right position. Pull the front panel off the UPS. On the backside of the front
panel, there are four tabs holding the face plate to the front panel. Push the four tabs
inward and the face plate will pop out. Position the face plate so that it reads in the up-right
position. Install the front panel on the UPS. Now the UPS is ready for the normal start-up
procedure.


