


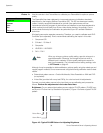


Operation
44 Runco PlasmaWall Owner’s Operating Manual
PRE
L
IMINAR
Y
Analog Out Mode: Select Analog Out Mode from the Service menu to change the
characteristics of the analog output signal from the DHD Controller. The choices are
RGB-- (separate sync with negative polarity), RGB++ (separate sync with positive polarity)
or RGBS (composite sync).
Display Device: The options in the Display Device menu allow you to perform certain
adjustments at the plasma display.
• Configure: Select Configure from the Display Device menu to perform the following
display device adjustments (these are global, independent of any input):
•Select Input Source from the Display Device menu to switch from one DHD
Controller output/PlasmaWall input to the other. Use the
or button to select
RGB or DVI/HDMI, then press ENTER.
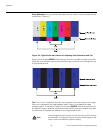
•Select Inverse to invert the colors in the displayed image. Use this for repairing
burned-in areas of the plasma display.
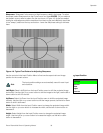
•Select Left/Right, Up/Down, Width or Height to fine-tune the aspect ratio and
image position.
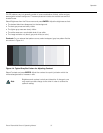
•Select Noise Filter to apply noise reduction to the displayed image.
HD Format: If the characteristics of the incoming signal on the HD1 or HD2 inputs are
known, select HD Format from the Service menu and set them as described below. Doing
so can reduce the time it takes the DHD Controller to switch from HD to 480i signals or
vice versa.
This is generally not necessary unless the DHD Controller – for whatever reason – has
difficulty determining the color space (RGB or YUV), bandwidth or resolution of the
incoming HD signal. In most situations, the Auto settings work well.
• HD/RGB 1 and HD/RGB 2 (Color Space): Select Auto, RGB or YUV.
• ADC Bandwidth: Select Auto, 75 MHz, 150 MHz or 300 MHz.
• YPbPr Input Resolution: Select Auto or specify the input resolution, if known: 480i,
480p, 576i, 576p, 720p or 1080i.
Triggers: Select Triggers from the Service menu to configure the 12-volt trigger outputs.
You can assign one or more trigger outputs to each aspect ratio. Those triggers are then
activated by selecting that aspect ratio.
To save the trigger settings so that they can be restored after a System Reset (described
below), press
repeatedly to highlight “Save.” Then, press ENTER.
If the DVI 1 or DVI 2 DHD Controller input is active and the input
signal is HDCP-encrypted, the RGBHV output of the DHD
Controller is disabled.
Use the serial command DISPLAY 4 or DISPLAY 5 to set the
Input Source to RGB or DVI/HDMI respectively, so that the DHD
Controller retains this setting after a
System Reset. (This is not the
case when you change the Input Source in the Display Device
menu.) For more information, refer to
Miscellaneous Commands
on page 53.
Note
Tip