


Installation and Connection 2-8
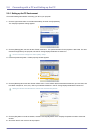
• The setup process might vary depending on your type of computer or version of Windows.
(For example, [Properties] appears instead of [Properties (R)] as shown in 1.)
• This projector supports 32 bit color quality (per pixel) when it is used as a PC monitor.
• Projected images may differ from the images on your monitor depending on the monitor manufacturer or Windows
version.
• When connecting the projector to a PC, make sure that the PC setup complies with the display settings supported by
this projector. If it does not, you may have signal problems.
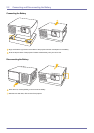
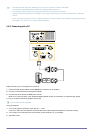
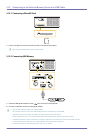
2-8-2. Connecting with a PC
Make sure that your PC and projector are turned off.
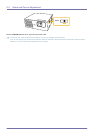
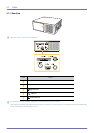
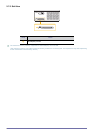
1. Insert the D-Sub gender adaptor into the [PC IN] slot on the back of the projector.
2. Connect a D-Sub cable to the D-Sub gender adaptor.
3. Connect the D-Sub cable to the RGB port on the PC.
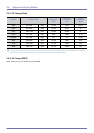
Refer to "PC Timing (D-Sub)" in the "Supported Display Modes" section for information on supported input signals.
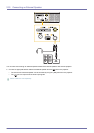
4. Plug in the power cords of the projector and the PC.
D-Sub cables are sold separately.
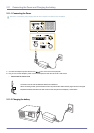
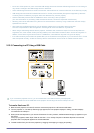
Using the Projector
1. Turn on the projector and select <Input Source> ĺ <PC>.
If the <PC> mode cannot be selected, check that the D-Sub cable and gender adaptor are connected correctly.
2. Turn on the PC, and then set the PC Environment (screen resolution, etc.) if necessary.
3. Adjust the screen.
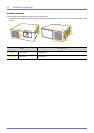
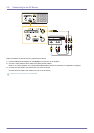
RGB
PC IN AV IN