English 5
English
FrançaisDeutschEspañolPortuguese Italiano
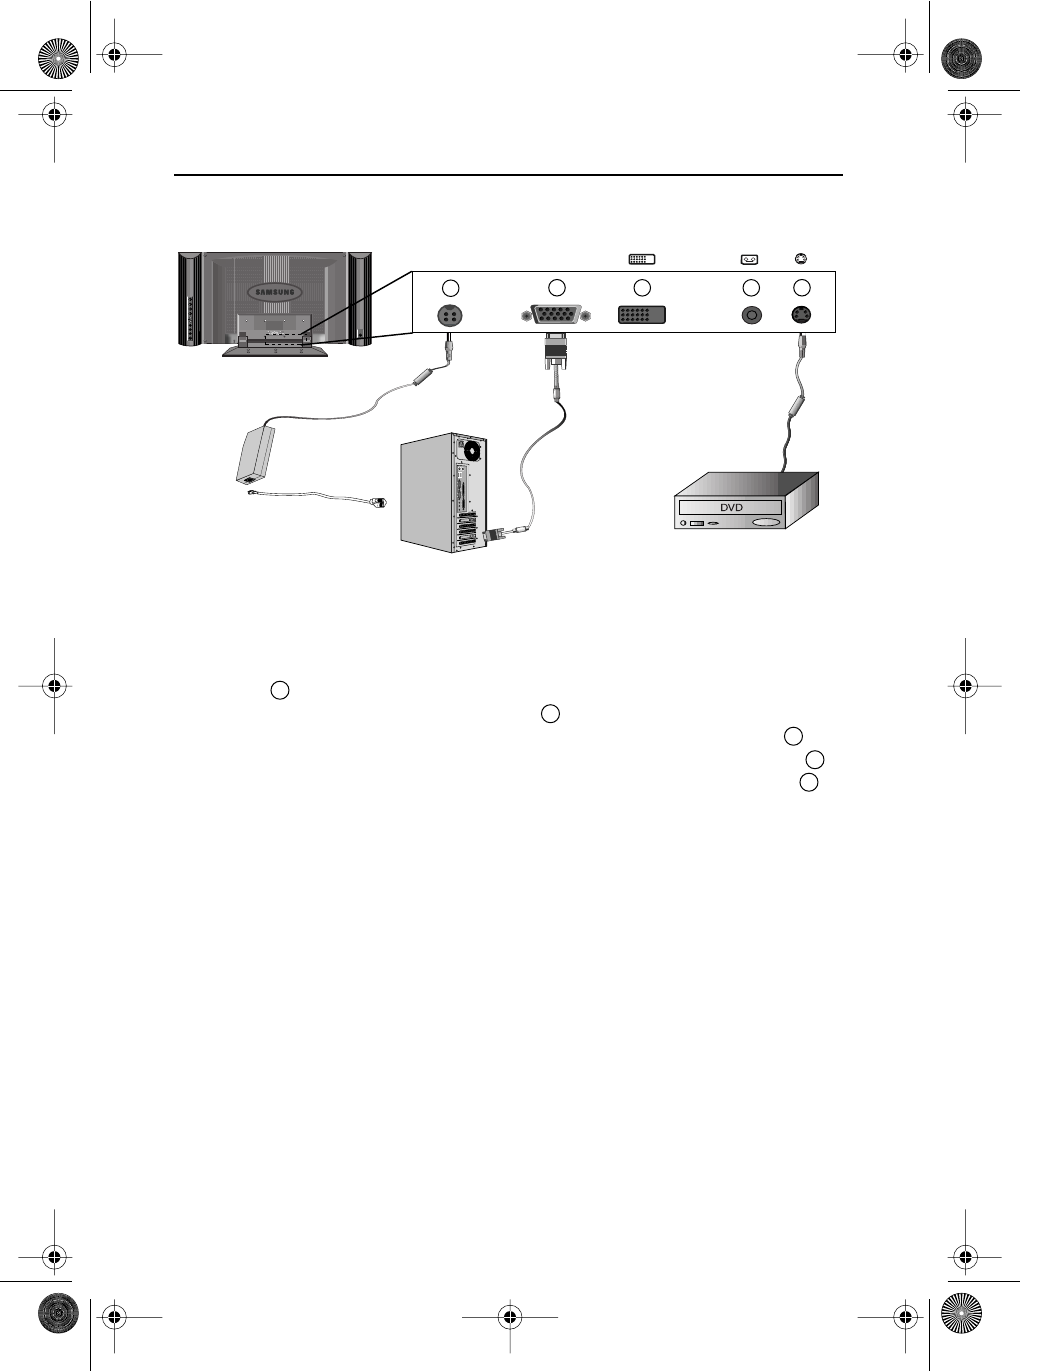
Connecting Your LCD Monitor
Figure 3. Cable connections
1. Connect the power cord to the DC adaptor and connect the adaptor plug to the DC14V power
connector 1 on the back of the monitor.
2. Connect the Analog video signal cable from PC to 2 .
3. Connect RCA cable from external video devices such as VCR, DVD, and Camcorder to 4 .
4. Connect S-Video cable from external video devices such as VCR, DVD, and Camcorder to 5 .
5. If you have a DVI compliant video graphics adaptor, connect DVI video cable from PC to 3 .
6. Turn the monitor on, and then turn on the computer.
7. Now, install the monitor driver with accompanied utility CD.
8. Recommended resolution of SyncMaster240T is WUXGA, 1920 x 1200 @ 60HZ.
NOTE: Although the monitor is designed to be compatible with wide variety of popular video
adaptors, it is WUXGA, 1920x1200 mode, that needs special care. Since there is no
industry standard for WUXGA mode, video adaptor manufacturers are using several
different configurations that cause the monitor false video mode interpretation. If the
screen image is quality is poor when you are using either UXGA or WUXGA mode, please
check the followings.
1. UXGA mode identified as WUXGA mode
–
Touch the “MENU” button, and then select “Hz”, information, icon.
–
Read the information and make sure that the video mode says “1600x1200”
–
If no resolution is appeared, then the monitor is in WUXGA mode.
2. WUXGA node identified as UXGA mode
–
Touch the “MENU” button, and the select “HZ”, information, icon.
–
Read the information and make sure that the video mode says only
“H_Sync... V_Sync...” without mentioning resolution.
–
If you read 1600x1200, then the monitor is in UXGA mode.
DC 14V
PC
1
23
4
5
Setting up Your LCD Monitor
body2.fm Page 5 Monday, September 18, 2000 8:53 AM
