Connections and Setup
-23
Optional
cable
Connecting to a Monitor
Watching Images on
Both the Projector and
a Monitor
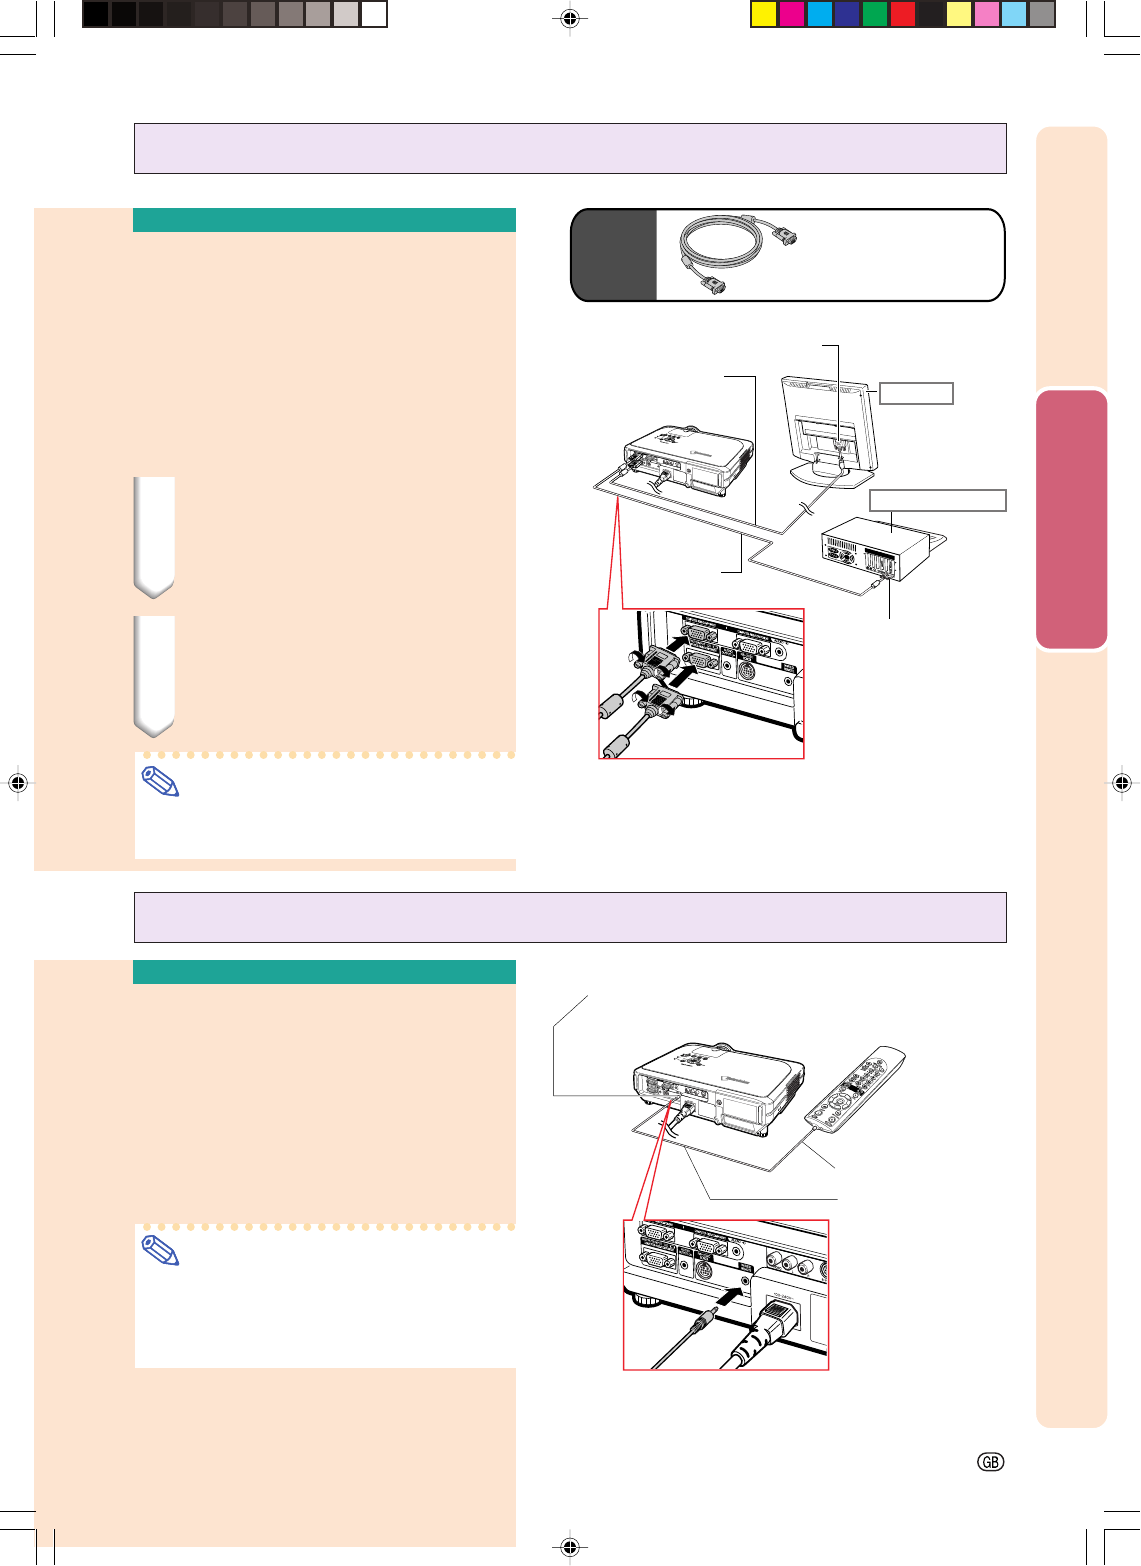
You can display computer images on both the
projector and a separate monitor using two
sets of an RGB cable. An RGB cable is sup-
plied with this projector. You need to buy an-
other RGB cable for connecting the projector
to a monitor.
1
Connect the projector to the
computer and monitor using
RGB cables (one is supplied, the
other is commercially available).
2 In the “Options(1)” menu, se-
lect “Economy Mode”, “Mntr.
out/RS232” and then “ON”.
(see page 69.)
Note
•Analog RGB signals as well as Component
signals can be output to the monitor.
To RGB input terminal
Monitor
RGB cable
(commercially available)
RGB cable
(supplied)
Desktop computer
To RGB output terminal
Supplied
accessory
RGB cable
Connecting the Remote
Control to the Projector
When the remote control cannot be used due to
the range or positioning of the projector (rear pro-
jection, etc.), connect a ø3.5 mm stereo or mono
minijack cable (commercially available or available
as Sharp service part QCNWGA038WJPZ) from the
WIRED R/C JACK on the top of the remote control
to the WIRED REMOTE control input terminal.
Note
•
FORWARD/BACK presentation control can-
not be used when the remote control is wired
to the projector. To utilize this feature, dis-
connect the cable from the remote control.
Using as a Wired Remote Control
ø3.5 mm stereo or mono
minijack cable
(commercially available or
available as Sharp service
part QCNWGA038WJPZ)
To WIRED R/C JACK
WIRED REMOTE control input terminal
XG-C60X_E_PDF_p19_24.p65 03.9.14, 4:16 PM23


