


E-19
Operation
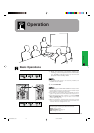
Setting up the Screen
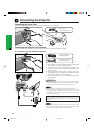
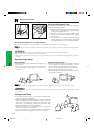
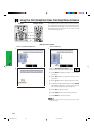
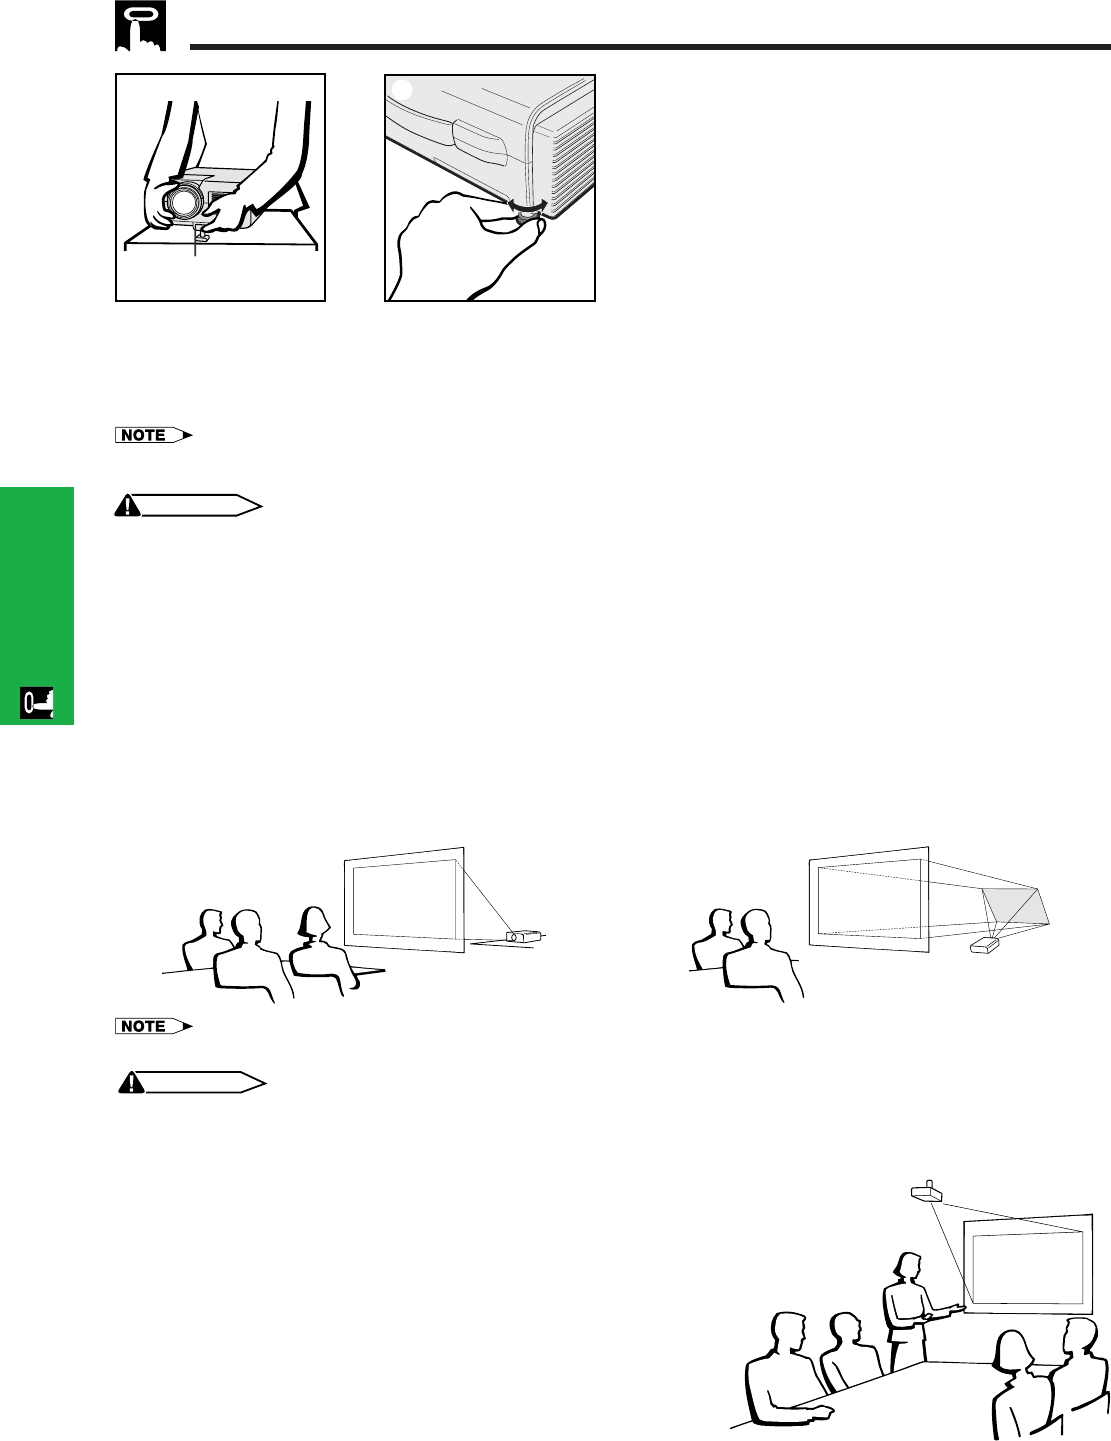
Using the Adjustment Foot
You can adjust the height of the image by raising the
projector with the foot release.
1 Press the foot release and lift the projector to the
desired angle. (Adjustable up to approximately
5° from the standard position.)
2 Remove your hand from the foot release. Once
the adjustment foot has locked in position, release
the projector.
3 If the screen is at an angle, the adjuster can be
used to adjust the angle of the image. (Adjustable
up to approximately 1° from the original position.)
1
3
Foot release
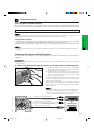
Returning the projector to its original position
While holding the projector, press the foot release and slowly lower the projector to its original position.
• When an adjustment is made, the image may become distorted (keystoned), depending on the relative positions of the projector and the
screen.
CAUTION
• Do not press the foot release when the adjustment foot is extended without firmly holding the projector.
• Do not hold the lens when lifting or lowering the projector.
• When lowering the projector, be careful not to get your fingers caught in the area between the adjustment foot and the
projector.
• Optimal image quality can be achieved when the projector is positioned perpendicular to the screen with all feet flat and level.
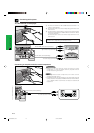
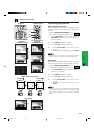
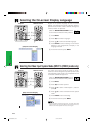
Reversed Image Setup
Projection using a mirror
• When the distance between the projector and screen
is not sufficient for normal rear projection, you can
use a mirror to reflect the image onto the screen.
• Place a mirror (normal flat type) in front of the lens.
• Project the normal image onto the mirror.
• The image reflected from the mirror is projected onto
the translucent screen.
Rear projection
• Place a translucent screen between the projector and
the audience.
• Use the projector’s menu system to reverse the
projected image. (See page 42 for use of this
function.)
CAUTION
• When using a mirror, be sure to carefully position both the projector and the mirror so the light does not shine into the eyes of
the audience.
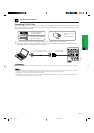
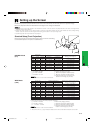
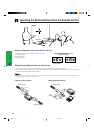
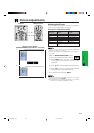
Ceiling-mount Setup
• It is recommended that you use the optional Sharp ceiling-
mount bracket for this installation.
• Before mounting the projector, contact your nearest Authorized
Sharp Industrial LCD Products Dealer or Service Center to
obtain the recommended ceiling-mount bracket (sold
separately). (AN-XGCM51 ceiling-mount bracket, AN-
EP101AP extension tube for AN-XGCM51.)
• When the projector is in the inverted position, use the upper
edge of the screen as the base line.
• Use the projector’s menu system to select the appropriate
projection mode. (See page 42 for use of this function.)
PG-C30XU/CD (E)-c 00.5.19, 3:46 PM19