


99-00667-00 B0 Installing the Interactive Whiteboard 7
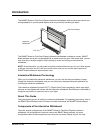
Installing the Interactive Whiteboard
To install your SMART Board for Flat-Panel Displays interactive whiteboard, you’ll have to:
1. mount the overlay on the flat-panel display (see below)
2. attach either a pen tray (page 16) or a controller (page 19)
3. complete the installation (page 21)
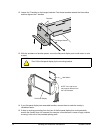
1. If your flat-panel display is already installed, check that the flat-panel display and its wall
mount or stand still have all of their hardware, including their screws and bolts.
IMPORTANT
The installation procedure varies depending upon whether you ordered your
interactive whiteboard with or without a pen tray.
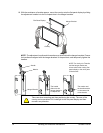
CAUTION
Before you mount the flat-panel display and the interactive whiteboard onto a stand
or wall mount, make sure that the combined weight does not exceed the maximum
weight specified by the stand or wall mount’s manufacturer.
To calculate the combined weight, add the flat-panel display’s weight (this should
be stated in the user's guide for the flat-panel display) to the interactive
whiteboard’s weight (this is stated in the Support section of www.smarttech.com on
the product-specific Specifications page).
Also, if the flat-panel display and the interactive whiteboard are mounted onto a
wall, the wall must be strong enough to support the combined weight.
IMPORTANT
Don’t mount an interactive whiteboard in portrait mode. The interactive whiteboard
will only work when its cameras are in the top-left and top-right corners.
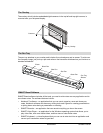
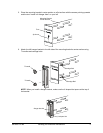
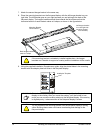
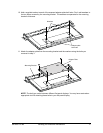
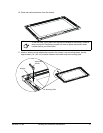
To mount the overlay on a flat-panel display
TIP
During the installation, you need sufficient room on flat surfaces for both a
facedown flat-panel display and a facedown overlay. Clear sufficient space for both
before you begin the installation.
CAUTION
You’ll need assistance with several of the steps in this procedure. Both the flat-
panel display and the overlay are heavy.