


SONY CAV-CVS12ES (US) 3-198-136-11(1)
9
US
Setting up the Component Video Switcher
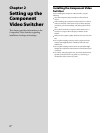
Using rack-mount brackets
You can also mount the Component Video Switcher into a rack.
Make sure that you measure the space needed before mounting.
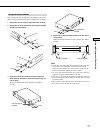
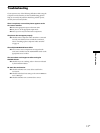
1 Detach the four feet of the Component Video Switcher.
2 Detach the six screws attached to the Component Video
Switcher as shown below.
Screws
Screws
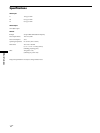
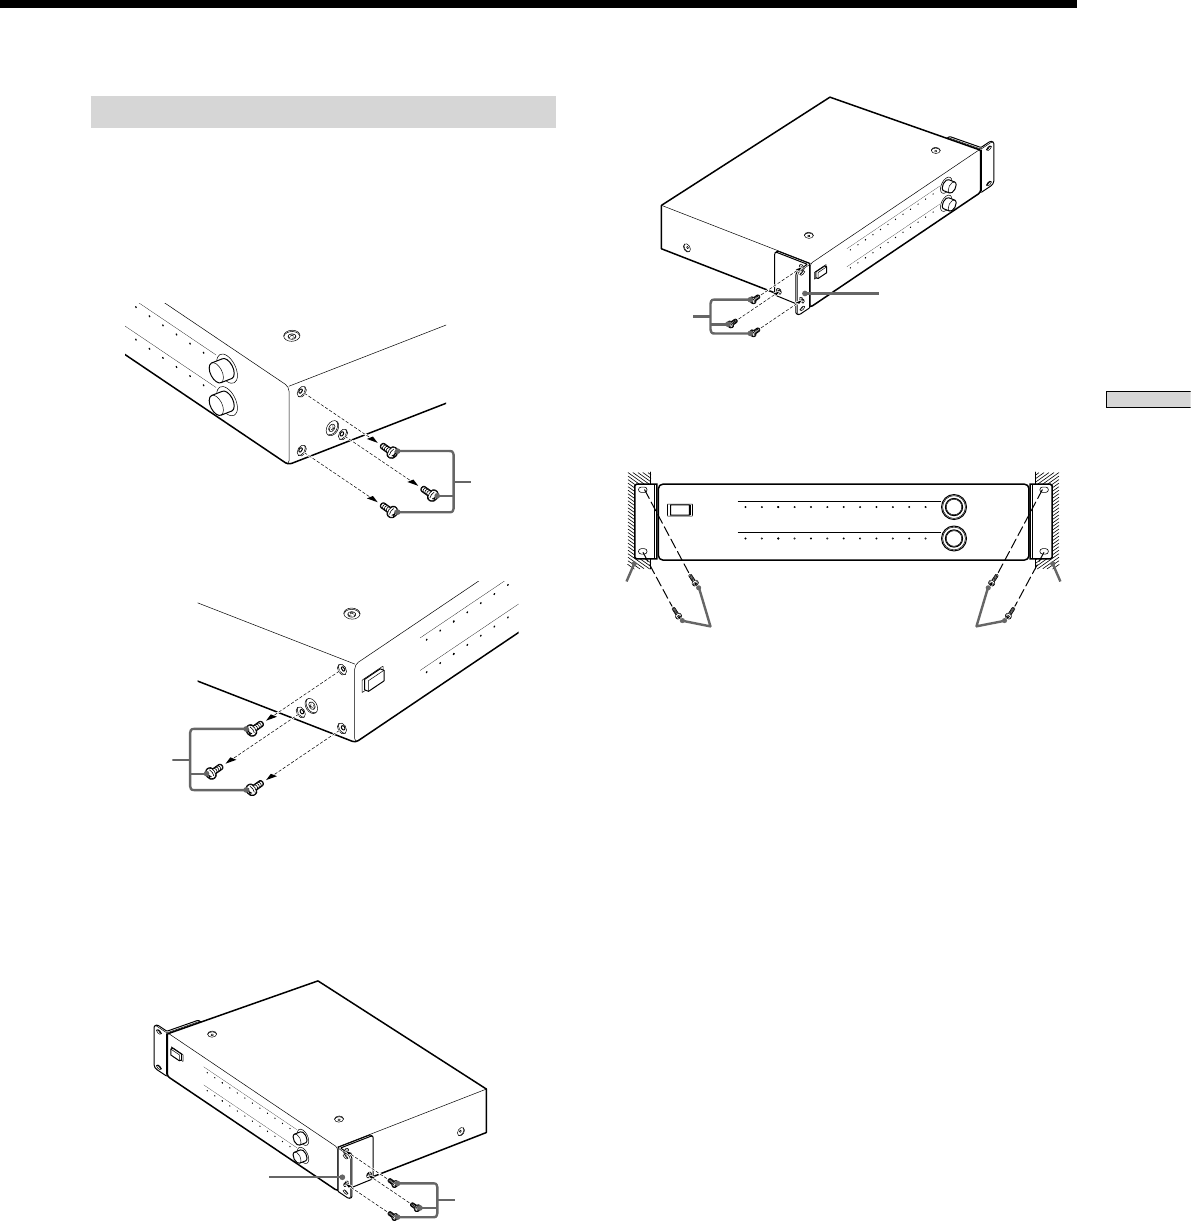
3 Install the rack-mount brackets onto the Component
Video Switcher with the six screws detached in step 2 as
shown below.
Make sure that the rack-mount brackets are installed
securely.
Rack-mount bracket
(supplied)
Screws
Screws
Rack-mount bracket
(supplied)
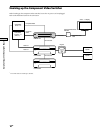
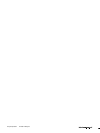
4 Mount the Component Video Switcher into the rack as
shown below.
Make sure that the Component Video Switcher is installed
securely.
Rack
POWER
1 2 3 4 5 6 7 8 9 10 11 12
1 2 3 4 5 6 7 8 9 10 11 12
ZONE
SOURCE
Screws (not supplied)Screws (not supplied)
Rack
Notes
Use the M4 × 11/32 inch (8mm) screws (attached to the Component
Video Switcher) for installing the rack-mount brackets onto the
Component Video Switcher. In case the screws are missing, use M4
screws with a maximum diameter of 1/2 inch (12mm).
Use screws with a minimum diameter of 3/16 inch (4mm) when you
mount the Component Video Switcher into the rack.
Make sure you check the rack manufacturer’s specifications before you
mount the Component Video Switcher into the rack. This is to ensure
mechanical stability.
This Component Video Switcher requires 2U height when you mount
the Component Video Switcher on a standard rack.