


17
Projecting an Image
Projecting/Adjusting an Image
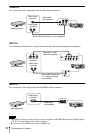
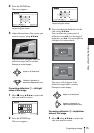
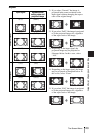
Adjust each correction zone by “Zone
Black Level Adj.” for the most uniform
black level between each zone.
During this adjustment, a black image is
automatically projected.
6 Set “Blend Gamma.”
Select the gamma mode in which the
overlapping of images is least
noticeable.
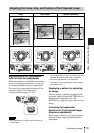
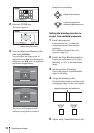
• The procedure shown above is for general
guidance. Your own installation may vary
according to the situation.
• In case of multiple projectors, use the color
matching function (page 30) to adjust for
differences in color and brightness.
Note that more detailed adjustment for Edge
Blending is possible using a PC application.
For more details, consult with qualified Sony
personnel.
• When multiple projectors are set up in a line,
the temperature inside the projectors may
increase due to exhaust vent proximity, and
an error indication may result.
In this case, space the projectors farther apart
and/or install deflection partitioning between
them.
For more details, consult with qualified Sony
personnel.
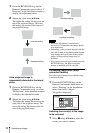
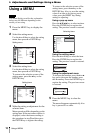
1 Press the ?/1 key on the main unit or
the 1 key on the Remote Commander.
The projector starts shutdown and turns
off. If you press the ?/1 key on the main
unit or the ? key on the Remote
Commander within 5 seconds again,
shutdown is cancelled.
2 Unplug the AC power cord from the
wall outlet.
To turn off without displaying
confirmation message
Press and hold the ?/1 key on the main unit
for a few seconds (page 36).
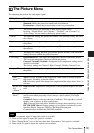
ECO gauge
This gauge indicates the current
effectiveness of the projector’s ECO
function. (For details on the ECO function,
see “ECO MODE key” (page 6) and “ECO”
(page 26).)
The leaf icons are displayed when the
projector is shut down. The number of
displayed icons varies according to how
much energy is saved as a result of using the
ECO function.
Notes
Turning Off the Power
Blend Gamma
correction
ECO gauge