1-3 (E)
PFV-SP3100
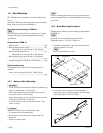
1-4. Installing/Removing Optional Power
Supply Unit
w
Before installing the backup power supply unit HK-PSU01
in PFV-SP3100, set the power switch of HK-PSU01 to the
“O” position (OFF).
Otherwise, deterioration of a connector which connects
HK-PSU01 to PFV-SP3100 may cause a fire.
Installation Procedure
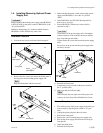
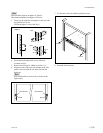
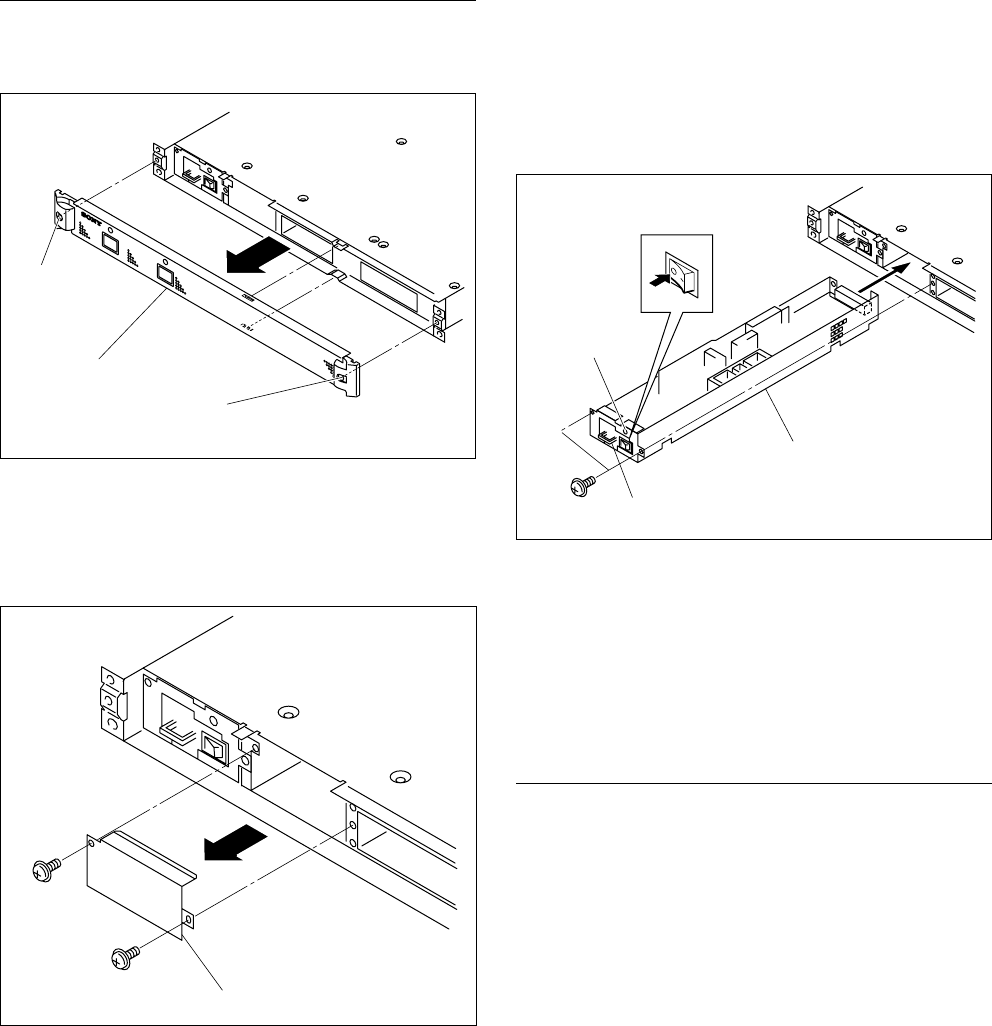
1. Loosen the two screws and remove the front panel.
2. Remove the two screws and remove the blank panel in
the empty slot for the backup power supply unit.
n
Keep the blank panel which is removed.
3. Make sure that the power switch of the backup power
supply unit HK-PSU01 is set to the “O” position
(OFF).
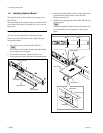
4. Insert HK-PSU01 into PFV-SP3100 and push it by
hand as far as it will go.
5. Secure HK-PSU01 with the two screws which is
removed in step 2.
c
If installation of the power supply unit is incomplete,
contact resistance of the connector increases and that
may cause damage and smoke.
Tighten firmly the screws that secure the power supply
units.
Do not turn on the power until the power supply units
are firmly secured.
6. Reinstall the front panel.
7. Connect the power cord and set the power switch to
the “I” position (ON).
8. Make sure that the indicator lights.
n
If the indicator does not light, turn off the power and
contact your local Sony Sales Office/Service Center.
Removal Procedure
1. Turn off the power of the power supply unit which you
want to remove. (Set the power switch to “O” posi-
tion.)
2. Unplug the power plug from the wall outlet.
3. Remove the front panel.
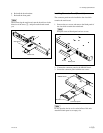
4. Remove the screws securing the power supply unit.
5. Pull out the power supply unit from the slot using its
front handle.
6. Install the blank panel.
7. Reinstall the front panel.
1-4. Installing/Removing Optional Power Supply Unit
Front panel
Screw
(with stopper)
Screw
(with stopper)
Blank panel
PSW 3x6
PSW
3x6
Handle
HK-PSU01
Indicator
PSW
3x6


