


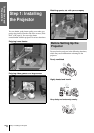
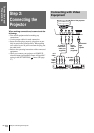
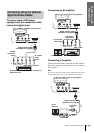
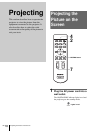

Connections and
Preparations
GB
14
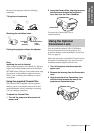
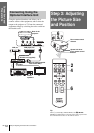
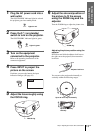
Step 3: Adjusting the Picture Size and Position
Adjusting the picture position using the
supplied adjuster spacer
Attaching one of the supplied spacers for adjuster
adjustment (spacers for 1
º and 2°) allows you to tilt
the projector to the right or left at a tilting angle up to
2
º.
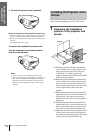
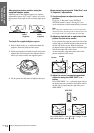
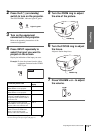
To attach the supplied adjuster spacer
1 Place a thick cloth (e.g., a cushion) beneath the
projector. Place the projector face down.
2 While pressing the lock knobs inward, remove the
adjuster bar at the bottom of the adjuster table to
which you want to attach the supplied spacer.
3 Fit the spacer into the removed adjuster bar spot.
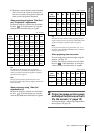
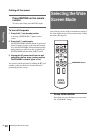
When projecting using both “Side Shot” and
“V Keystone” adjustments
1 Use the adjuster to adjust the vertical
position.
If you set “V Keystone” in the INSTALL
SETTING menu to “Auto” (1 page 27), the
vertical distortion will be automatically corrected.
Note
The “V Keystone” adjustment may not correct trapezoidal
distortion perfectly, depending on the room temperature or the
screen angle. In this case, adjust the distortion manually.
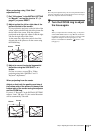
2 Adjust so that the left or right side of the
picture fits that of the screen.
If you position the projector on the left side of the
screen, adjust so that the left side of the picture fits
the left side of the screen. With the projector
positioned on the right side, adjust so that the right
side fits the right side of the screen.
At the same time, align the bottom side of the
picture with that of the screen.
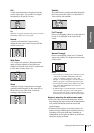
3 Adjust to correct horizontal trapezoidal
distortion using the SIDE SHOT + or –
button.
Press SIDE SHOT + or – so that the upper side of
the picture becomes parallel to the bottom side. If
the left side is longer than the right side, press
SIDE SHOT –.
Press SIDE SHOT + if the right side is longer. To fine-
adjust the distortion, press M or m.
Adjuster
spacer
(supplied)
Adjuster
spacer
(supplied)
Picture
Screen
SIDE SHOT