


11
GB
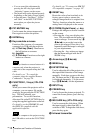
Location and Function of Controls
Overview
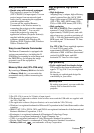
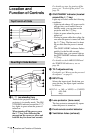
8 Control/Connector panel
For details, see “Control Panel” and
“Connector Panel” on page 12.
9 Rear remote control detector
0 Ventilation holes (intake)
qa Ventilation holes (intake)/Lamp
cover
qs Powered tilt adjuster
qd Adjuster (hind pad)
Turn the adjuster to the right or left for
minor tilt adjustment of the projected
picture.
qf Speaker
qg Security lock
Connects to an optional security cable
(Kensington’s).
Web page address:
http://www.kensington.com/
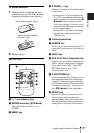
qh Focus ring
Adjusts the picture focus.
qj Zoom ring
Adjusts the picture size.
qk Ventilation holes (intake)/air
filter cover
• Do not place anything near the
ventilation holes as it may cause
internal heat build-up.
• Do not place your hand or objects
near the ventilation holes as it may
cause the air coming out heat build-
up.
• To maintain optimal performance, clean
the air filter every 300 hours.
For details, see “Cleaning the Air
Filter” on page 42.
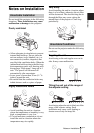
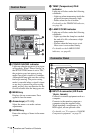
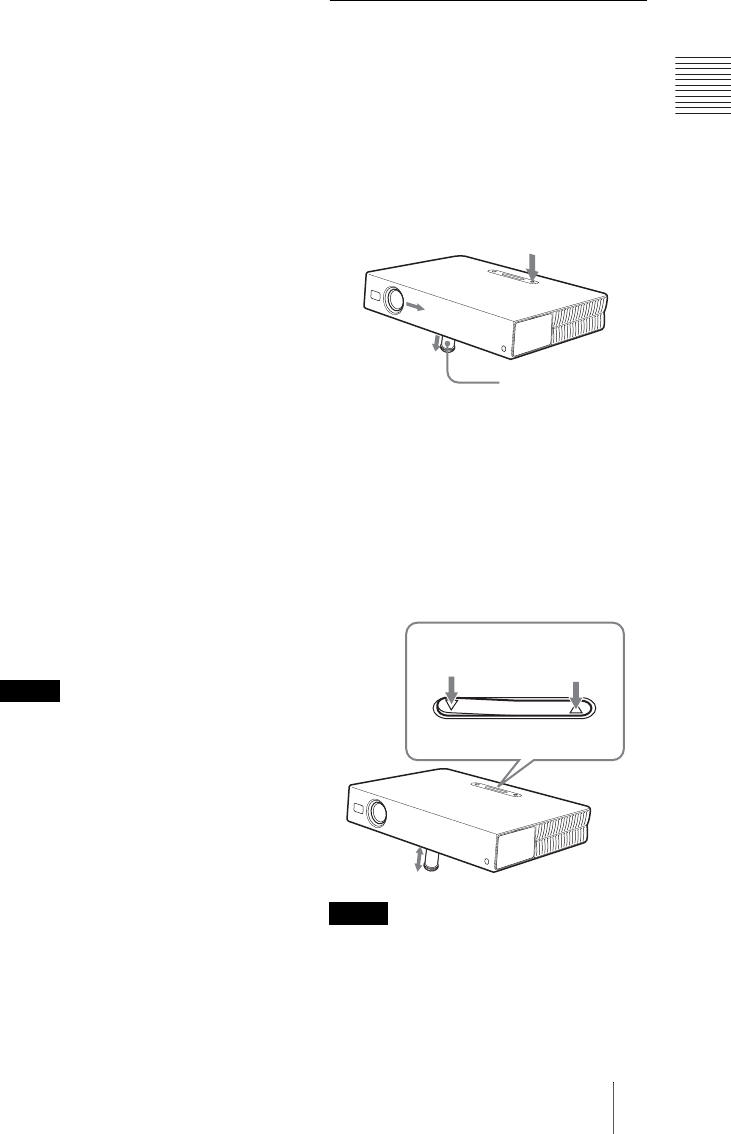
How to use the powered tilt
adjuster
To adjust the height
Adjust the height of the projector as follows:
1 Press the I / 1 key
The lens protector opens, and the
powered tilt adjuster rises automatically.
The adjuster stops at its previously
adjusted position.
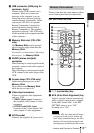
2 Press f or F of the TILT key to adjust
the tilt of the projector.
You may press the KEYSTONE key
(VPL-CS6/CX6) or the D KEYSTONE
key (VPL-EX1) on the Remote
Commander to display the Tilt menu and
adjust the tilt using the M/m/</,
keys.
• Be careful not to let the projector down on
your fingers.
• Do not push hard on the top of the projector
with the powered tilt adjuster out.
It may be occurred malfunction.
Notes
Notes
Powered tilt
adjuster
TILT
to lower the
projector
to raise the
projector
TILT adjustment key
to raise the
projector