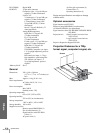
Troubleshooting
Others
51
GB
Others
Troubleshooting
Power
The power is not
turned on.
c Wait for about one minute
before turning on the power.
(1 page 22)
c Close the lamp cover securely.
(1 page 53)
c Close the air filter cover
securely. (1 page 54)
Picture
No picture. c Check that the proper
connections have been made.
(1 page 13)
c Select the input source correctly
using the INPUT button.
(1 page 21)
c Set the computer signal to output
from an external monitor.
c Set the computer signal to output
only to an external monitor.
This section describes how to solve the
problems, how to replace a lamp and air
filter, etc.
The picture from the PJ
MULTI connector is
colored strange.
c Select “Computer”,
“Component” or “Video GBR”
for “Input-A Signal Sel” in the
SET SETTING menu
according to the input signal.
(1 page 29)
Color balance is
incorrect.
c Adjust the picture in the “Adjust
Picture ...” of the PICTURE
SETTING menu
(1 page 27).
c Set “Color System” in the SET
SETTING menu to match
the color system being input.
(1 page 29)
The picture is too dark. c Adjust the contrast or brightness
in the “Adjust Picture ...” of the
PICTURE SETTING menu
properly. (1 page 27)
The picture is not clear. c Adjust the focus with the
FOCUS +/–. (1 page 22)
c Condensation has occurred on
the lens. Leave the projector for
about two hours with the power
on.
The picture flickers. c Adjust “Dot Phase” for “Adjust
Signal...” in the INPUT
SETTING menu properly.
(1 page 28)
Sound
No sound. c Sound can be heard only when
an MPEG1 format movie picture
is played. (1 page 27)
c Adjust “Volume” in the
PICTURE SETTING
menu, or press VOLUME + on
the remote control.
On-screen display
On-screen display does
not appear.
c Set “Status” in the MENU
SETTING menu to “On.”
(1 page 29)
Remote control
The remote control
does not work.
c Batteries could be weak.
Replace with new batteries. (1
page 6)
c Insert the batteries with correct
polarities. (1 page 6)
“Memory stick”
The “Memory Stick”
cannot be inserted into
the “Memory Stick”
slot.
c Insert the “Memory Stick” with
the arrow mark pointing toward
the “Memory Stick” slot of the
projector. (1 page 33)


