


18 (EN)
Projecting
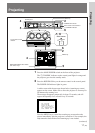
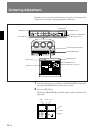
3 Turn on the power of the connected equipment.
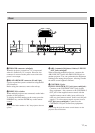
4 Select the input signal to be projected by pressing the INPUT SELECT
key.
VIDEO and SELECT keys: To project the signal input from the
equipment connected to the VIDEO IN or S VIDEO IN (or Y/C IN)
connectors. Select VIDEO or S VIDEO by pressing the VIDEO key,
then the SELECT key.
A: To project the RGB, component or the HDTV signal input from the
equipment connected to the INPUT A connectors.
B: To project the signal input from the equipment connected to the
optional interface board other than the IFB-40 installed to the
INPUT B section.
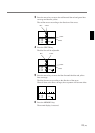
When the PC-1271/1271M Signal Interface Switcher is connected:
Set the SWITCHER/INDEX select switch on the remote control to
SWITCHER and then select the input with the number keys 1 to 8.
If two switchers are connected, press the SECOND key and then the
number key to select the input from the second switcher.
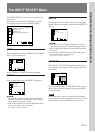
Note
When you select the input signal connected to the INPUT A or INPUT B section,
be sure to select the correct signal in the SET SETTING menu. If an incorrect
signal is selected, picture may be distorted.
For details, see “The SET SETTING Menu” on page 31 (EN).
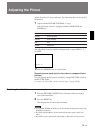
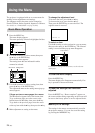
5 Adjust the picture.
For details, see “Adjusting the Picture” on page 19 (EN).
6 To turn the power off, press the POWER OFF key on the remote
control or on the control panel of the projector, then set the MAIN
POWER switch on the projector to OFF.
To Press
Trun off the on-screen display
the STATUS OFF key. The menus and
warning messages appear even if the
OFF key is pressed.
To restore the on-screen display, press
the STATUS ON key.
Cut off the picture the MUTING PIC key.
To restore the picture, press the
MUTING PIC key.