


Overview 9
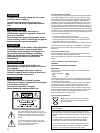
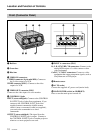
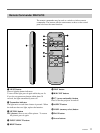
B CENT R CENT
INPUT A
VIDEO POWERS VIDEOPAGEM SEL
INPUT SELECT
ASPECT
RESET
TEST V HOLD H SHIFT
1
3
4
56789!º!¡ 2
Control Panel
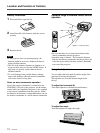
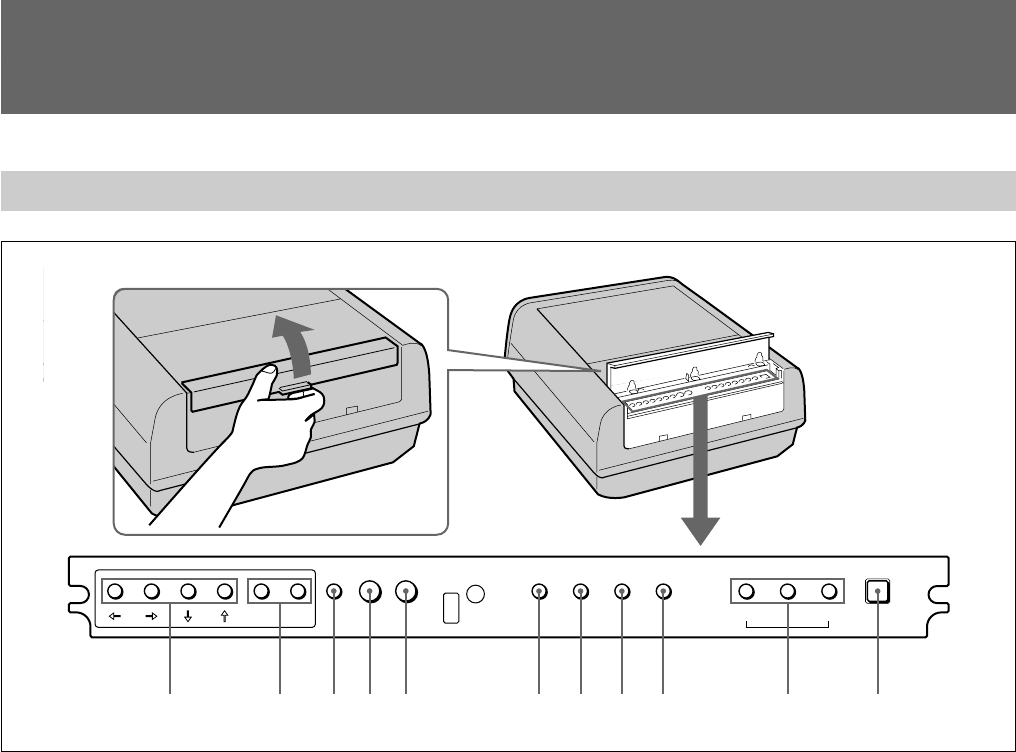
Open the control
panel cover.
6 RESET button
Press to restore the picture adjustment levels to the
standard levels. The button functions while the
PICTURE CONTROL display or the adjustment level
is displayed on the screen.
7 H SHIFT (horizontal shift) control
Turn to adjust the horizontal position of the RGB input
picture.
8 V HOLD (vertical hold) control
If the picture rolls vertically, turn to stabilize the
picture.
9 TEST button
Press to display the test pattern to check the centering
of the three colors, red, green and blue. To restore the
normal screen, press it again.
!º R/B CENT buttons
Press to enter the red and blue centering adjustment
mode.
R CENT: to enter the red centering adjustment mode.
B CENT: to enter the blue centering adjustment mode.
To perform the centering adjustment, use the four
arrow buttons.
To return to the normal display, press the same button
again.
!¡ Arrow buttons
Use these buttons for various adjustment functions.
1 POWER switch
Press to turn the projector on and off.
2 INPUT SELECT buttons
Press to select the input signal.
VIDEO connector (BNC): to select the signal input
from the VIDEO IN VIDEO connectors
S VIDEO connector (4-pin mini DIN): to select the
signal input from the VIDEO IN S VIDEO connectors
INPUT A: to select the signal input from the INPUT
A connectors
3 ASPECT button
Press to switch the aspect ratio between 4:3 picture and
16:9 picture.
4 PAGE button
Press to display three on-screen displays. You can
check and change various control settings. Each time
you press the button, the following display appears:
USER PRESET, PICTURE CONTROL and SYSTEM
PRESET.
5 M SEL (memory select) button
Press to select the memory position of the picture
adjustment levels.
Location and Function of Controls