


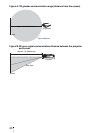

44
Using the Supplied Software to Adjust the
Picture Quality (ImageDirector3)
By using the “ImageDirector3” (supplied as a CD-ROM), you can make the desired
gamma correction from a computer connected to the projector. Connect the REMOTE
connector of the projector with a computer and start-up “ImageDirector3” on the
computer.
For details on how to use the “ImageDirector3,” refer to the Help within the CD-ROM.
• You need to install the “ImageDirector3” on a computer beforehand.
• When connecting the REMOTE connector with a computer, connect while the power of the
computer and the projector is off.
• You can only perform adjustment with “ImageDirector3” when “Gamma Correction” in the
Picture menu is set to Gamma 1 to 6. Adjustment is not possible when it is set to Gamma 7 to 10
and Off.
• Before using “Image Director3,” use the Picture menu to set “Gamma Correction” to Off or
Gamma 1 to 6.
• If use “ImageDirector3” while a 3D video image is displayed and a 3D signal is input, the image
may be distorted.
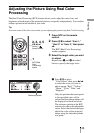
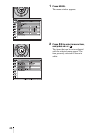
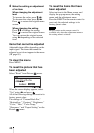
2 Press M/m to select “Position” or
“Range,” and specify it more
delicate color position and color
range you want to adjust using
</,.
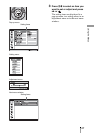
4 Adjust the color of the specified
portions.
Press
M/m to select “RCP Color,”
“RCP Hue” or “RCP Brightness,”
then adjust the color or hue of the
portions selected in step 3 to suit your
taste using
</, while watching the
projected picture. The picture is
returned to normal color during
adjustment.
5 After the adjustment is
complete, press .
The RCP window disappears and the
picture of step 2 is appeared. Then
after a few seconds, normal picture is
restored.
Tip
There are some limitations on selection of
position and range.
Notes