


System Upgrade Procedure 11
Replacing the Outer Panels
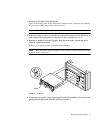
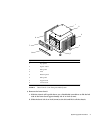
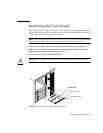
1. Place the system front side down as shown in FIGURE 7.
2. Replace the lower bezel:
a. Align the bezel 1/4 of an inch (6 mm) to the left of the system chassis to engage
the tabs.
b. Slide it to the right until it locks into position.
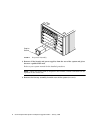
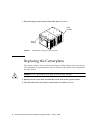
3. Replace the bottom panel.
Set the panel about an inch back from the front of the system chassis. Push the panel
forward until it locks into place.
4. Secure each foot to the bottom of the system chassis with the screws removed
previously.
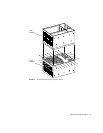
5. Turn the enclosure over so that the feet are supporting the chassis.
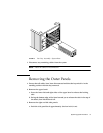
6. Replace the top panel:
a. Set the panel about an inch back from the front of the system chassis. Push the
panel forward until it locks into place.
b. Align the small dots on the square inserts with the dots on the top panel and
press the inserts until they engage.
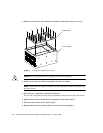
7. Replace the right and left side panels:
a. With the panel set about 3/4 of an inch (2 cm) back from the system chassis,
align the top and bottom panel tabs with the corresponding slots on the system.
b. Push the panel forward to lock it in place.
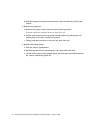
8. Replace the upper bezel:
a. Set the tabs at the top of the bezel into the corresponding slots at the top of the
system chassis.
b. Press the bottom of the bezel into place.