


12 Sun Enterprise 4000 System Centerplane Upgrade Guide • January 1999
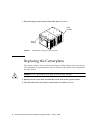
Replacing the Boards and Assemblies
Caution – Use a grounding wrist strap to prevent static damage.
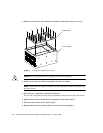
1. Replace all the boards and power supplies in the front of the system.
Note – Insert boards component side down in the front of the system.
Refer to your system manual for the detailed procedure.
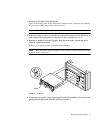
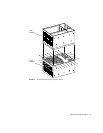
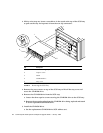
2. Tighten the bottom three captive screws on the SCSI tray to secure the tray to the
enclosure (
FIGURE 3).
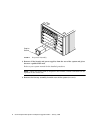
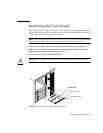
3. Replace the keyswitch assembly in the front of the system (
FIGURE 4).
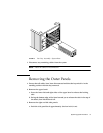
4. Replace the fan tray assembly in the rear of the system (
FIGURE 5).
5. Replace the boards and power supplies in the rear of the system.
Note – Insert boards component side up in the rear of the system.
6. Replace the top cover by sliding it over the key slots until it fits securely on the
main chassis.
7. Replace the square inserts on the corners of the top panel (
FIGURE 6).
8. Place each side vent alongside the main chassis and push the vent forward until it
stops.
9. Replace the top bezel.
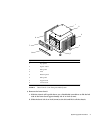
10. Ensure that the keyswitch is in the Standby position (
FIGURE 1).
11. Reattach the I/O cables.
12. Reattach the power cables.