


Chapter 6: Advanced Chassis Setup
6-9
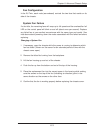
6-6 Installing the Air Shrouds
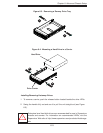
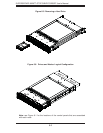
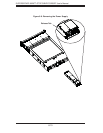
Air Shrouds
Air shrouds concentrate airfl ow to maximize fan effi ciency. The SC827 chassis air
shroud does not require screws to set up. Two identical air shrouds are required,
one for each serverboard/node.
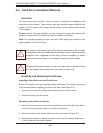
Installing an Air Shroud
Confi rm that all four fans are in place and working properly1.
Place an air shroud into the serverboard drawer, positioning it behind the 2.
system fans and over the serverboard and its components.
Repeat the procedure for the remaining serverboard drawer.3.
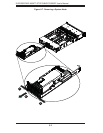
6-7 Power Supply
The SuperServer 6026TT-GTRF/6026TT-GIBXRF/6026TT-GIBQRF has two 1400
watt power supply modules to provide redundant power for the system. If either of
the two power supply modules fail, the other module will take the full load and allow
the system to continue operation without interruption. The LED on the control panel
for node A will fl ash slowly (about 4 seconds on and 4 off) and remain fl ashing until
the failed unit has been replaced. Replacement units can be ordered directly from
Supermicro (see contact information in the Preface). The power supply units have
a hot-swap capability, meaning you can replace the failed unit without powering
down the system.
Removing/Replacing the Power Supply (Figure 6-8)
Disconnect the AC power cord from the failed module.1.
Push the colored release tab to the side and pull the power module out with 2.
the handle provided.
Replace the failed power supply module with the exact same model from 3.
Supermicro.
Carefully insert the new module into position in the chassis and push it in until 4.
fully seated. You should see the LED on the rear of the module turn amber
showing that power (from the backup module) is present.
Reconnect the AC power cord to the new module.5.