3 USEFUL FUNCTIONS
46 Changing Scan Settings
Changing Scan Settings
“Scan settings” are settings applied commonly to the “Scan to e-Filing”, “Scan to File”, “Scan to E-mail” and “Scan to USB”
functions. The options frequently used in scanning are generally registered as the default scan settings ( P.16), and you
can scan documents without changing the settings. If you want to change the settings for a particular job to suit your
preferences, press [SCAN SETTING] on the touch panel and select the desired settings. The SCAN SETTING screen
consists of 4 pages. Use and to switch between them.
y Page 1/4
P.46 “Specifying color mode”
P.47 “Specifying resolution”
P.47 “Selecting original mode”
P.49 “Changing orientation”
P.50 “Scanning 2-sided originals”
P.51 “Specifying original size”
y Page 2/4
P.52 “Changing compression ratio”
P.52 “Removing blank pages”
P.53 “Erasing black frames around images”
y Page 3/4
P.54 “Adjusting exposure”
P.54 “Adjusting contrast”
P.54 “Adjusting background density”
P.55 “Adjusting sharpness”
y Page 4/4
P.55 “Adjusting color balance”
If you finish changing the desired settings, press [OK] to set your selections and continue the scan operation.
P.18 “Scan to File”
P.26 “Scan to E-mail”
P.33 “Scan to USB”
For instructions on how to store your scans with Scan to e-Filing, refer to the e-Filing Guide.
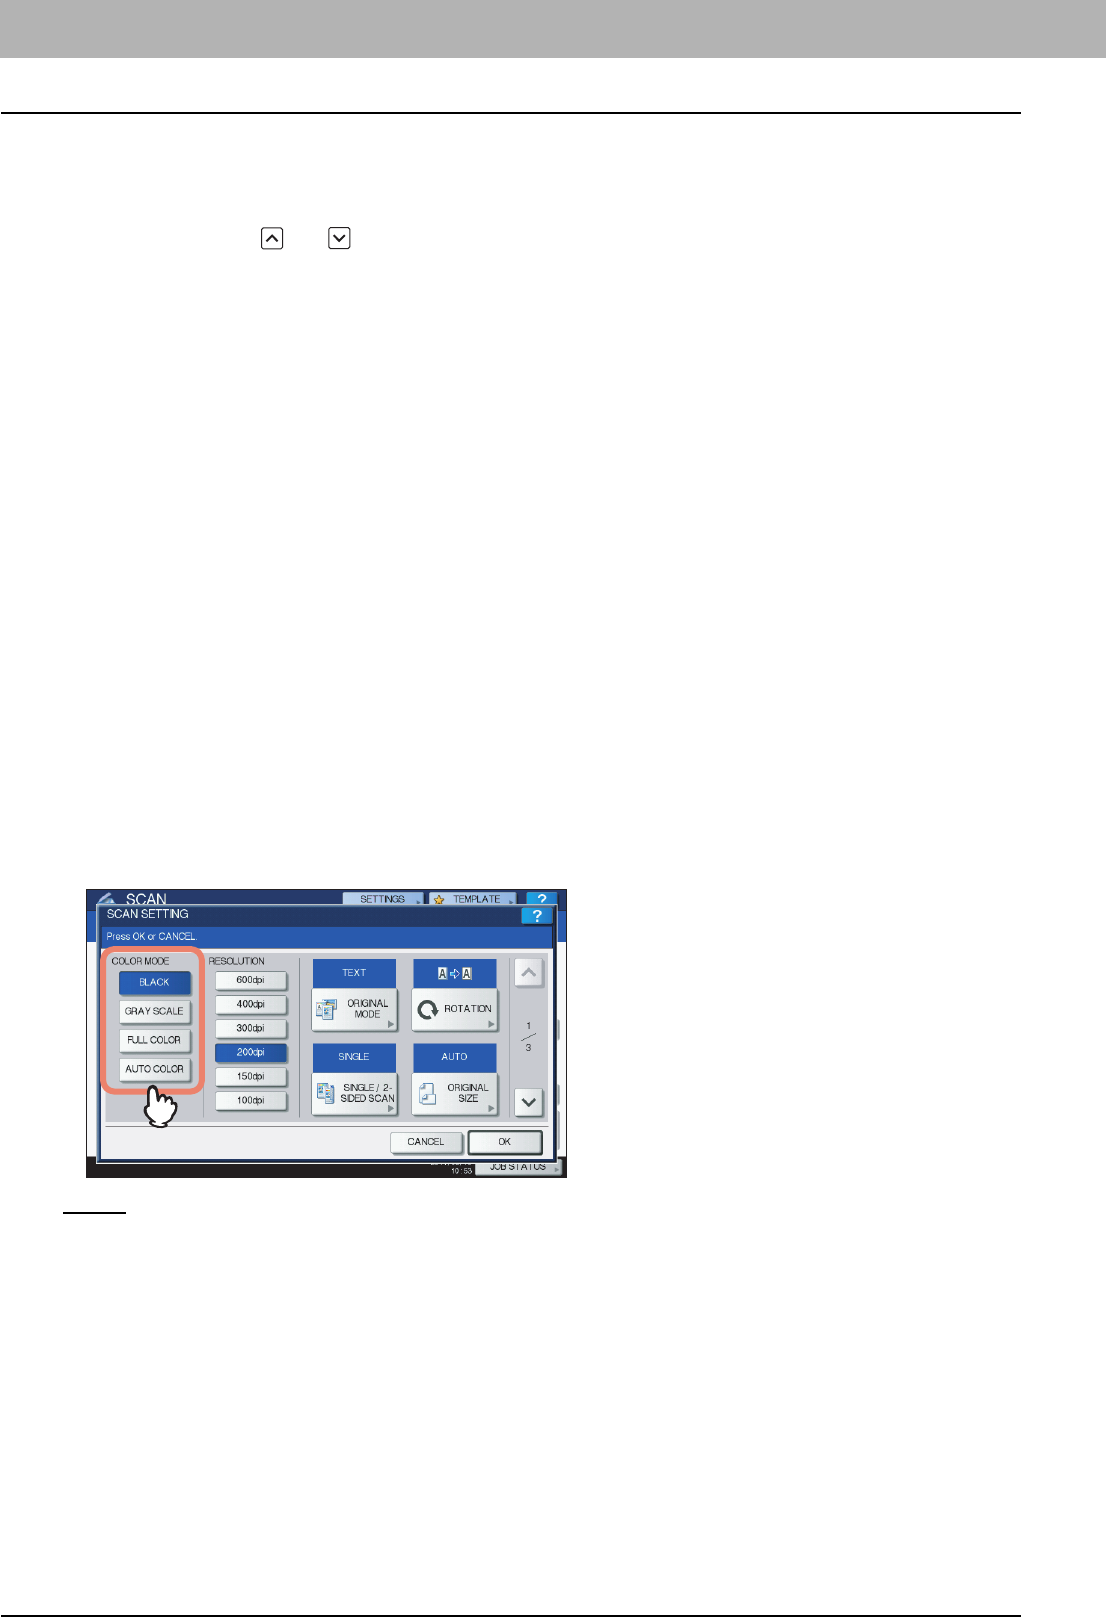
Specifying color mode
Select the color mode best suited to your scan job from the following options:
[BLACK] — Select this option to scan images in black and white.
[GRAY SCALE] — Select this option to scan images containing both text and photos and when you want to enhance the
photo quality.
[FULL COLOR] — Select this option to scan color images.
[AUTO COLOR] — Select this option to scan monochrome images in black and white and color images in color by
automatically detecting the color type of each document page. The level for determining color or monochrome can be set
with the ACS Adjustment setting accessible from the [USER FUNCTIONS] button on the control panel. For details, refer to
the MFP Management Guide.
