


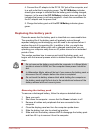
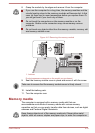
4. Connect the AC adaptor to the DC IN 19V jack of the computer, and
to a wall outlet that is supplying power. The DC IN/Battery indicator
should glow orange to indicate that the battery pack is being charged,
however, in the event that DC IN/Battery indicator does not glow this
indicates that power is not being supplied - check the connections for
the AC adaptor and the power cord.
5. Charge the battery pack until the DC IN/Battery indicator glows
green.
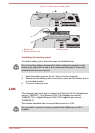
Replacing the battery pack
Please be aware that the battery pack is classified as a consumable item.
The operating life of the battery pack will gradually reduce through
repeated charging and discharging, and will need to be replaced when it
reaches the end of its operating life. In addition to this, you might also
replace a discharged battery pack with a charged spare when you are
operating your computer away from an AC power source for an extended
period of time.
This section explains how to remove and install the battery pack, and
begins with the removal process which is detailed through the following
steps.
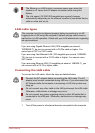
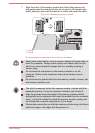
Do not remove the battery pack while the computer is in Sleep Mode,
as data is stored in RAM, so if the computer loses power it could be
lost.
In Hibernation Mode, data will be lost if you remove the battery pack or
disconnect the AC adaptor before the save is completed.
Do not touch the battery release latch while holding the computer or
the battery pack might fall out due to the unintentional release of the
battery release latch and cause injuries.
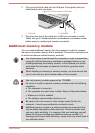
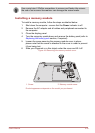
Removing the battery pack
To remove a discharged battery, follow the steps as detailed below:
1. Save your work.
2. Shut down the computer - ensure that the Power indicator is off.
3. Remove all cables and peripherals that are connected to the
computer.
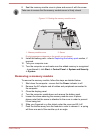
4. Close the display panel and turn the computer upside down.
5. Slide the battery lock into its unlock ( ) position.
6. Slide and hold the battery release latch to disengage the battery pack
and then lift it up to remove it from the computer.
User's Manual
4-26