


9-1
EO1-33006
9. THRESHOLD SETTING
9. THRESHOLD SETTING
For the printer to maintain a constant print position it uses the transmissive sensor to measure the amount
of light passing through the gap between labels. When the paper is pre-printed, the darker (or more
dense) inks can interfere with this process causing paper jam errors. To eliminate this problem a
minimum threshold can be set for the sensor in the following way.
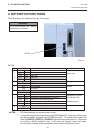
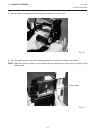
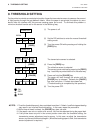
(1) The power is off.
(2) Set the DIP switches to enter the manual threshold
setting mode.
(3) Turn the power ON while pressing and holding the
[FEED] key.
The transmissive sensor is selected.
(4) Press the [FEED] key.
The reflective sensor is selected.
The sensor type is switched by pressing the [FEED]
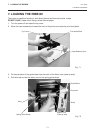
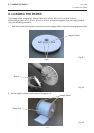
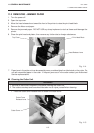
key. Load the pre-printed label roll in the usual way.
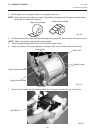
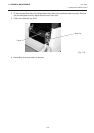
(5) Press and hold the [PAUSE] key.
The paper will feed through the printer until the
[PAUSE] key is released. Release the [PAUSE]
key after more than 1.5 labels have been fed.
(Threshold setting is completed by this operation.)
(6) Turn the power OFF.
NOTES: 1. To set the threshold properly, be sure to feed more than 1.5 labels. Insufficient paper feeding
may result in an incorrect threshold setting. In this case, repeat the procedure.
2. While the print head is raised, the [PAUSE] key does not work.
3. If the paper runs out or a cutter error occurs, it will not be detected during the paper feed.
4. If the printer does not print in the correct position even after the threshold setting, the
transmissive sensor adjustment may be wrong. In this case, re-adjust the transmissive
sensor, and then set the threshold again. (When the backing paper is thick, the transmissive
sensor adjustment is required.)
Power ON
Power Online Error
Power Online Error
Power Online Error
[FEED]
[PAUSE]
[FEED]
DIPSW
6
ON
7
OFF
8
ON
Power OFF
: ON
: OFF
: BLINK
9. THRESHOLD SETTING